Before you draw a state bird, you need to know exactly which bird you're drawing. The state bird of Illinois is the northern mockingbird. If you're working on the Texas state bird or the Florida state bird, you're actually drawing the same species: the northern mockingbird (Mimus polyglottos). Both states adopted it as their official state bird in 1927, Texas on January 31 and Florida on April 23 via Senate Concurrent Resolution No. 3. Once you've confirmed the species, the drawing process becomes much more straightforward because you're working from a real, well-documented bird with distinct, drawable features.
How to Draw the State Bird: Texas and Florida Guide

Marcus Webb
4 May 2026
Pick the correct state bird first
The phrase "state bird" covers 50 different official designations, and several states share the same species. The northern mockingbird, for example, is the official state bird of five states: Texas, Florida, Arkansas, Mississippi, and Tennessee. If you're drawing for a school project or just want to be accurate, confirm which state you're working with before starting. A quick lookup on a state-by-state reference list will show you the common name, scientific name, and adoption year all at once.
For this guide, the two featured states are Texas and Florida, both of which officially designate Mimus polyglottos, the northern mockingbird. The species name translates loosely to "many-tongued mimic," which tells you a lot about the bird before you ever look at one. It's a medium-sized songbird, not a flashy bird by color, but it has a distinctive silhouette and markings that make it identifiable and interesting to draw.
If you're drawing another state's bird entirely, the general method in this guide still applies. The construction approach (shapes first, proportions second, markings last) works across species. Just make sure you're looking at the right bird. Individual state pages on this site confirm the official species for each state, which is the fastest way to double-check before you start sketching.
What to study before you pick up a pencil
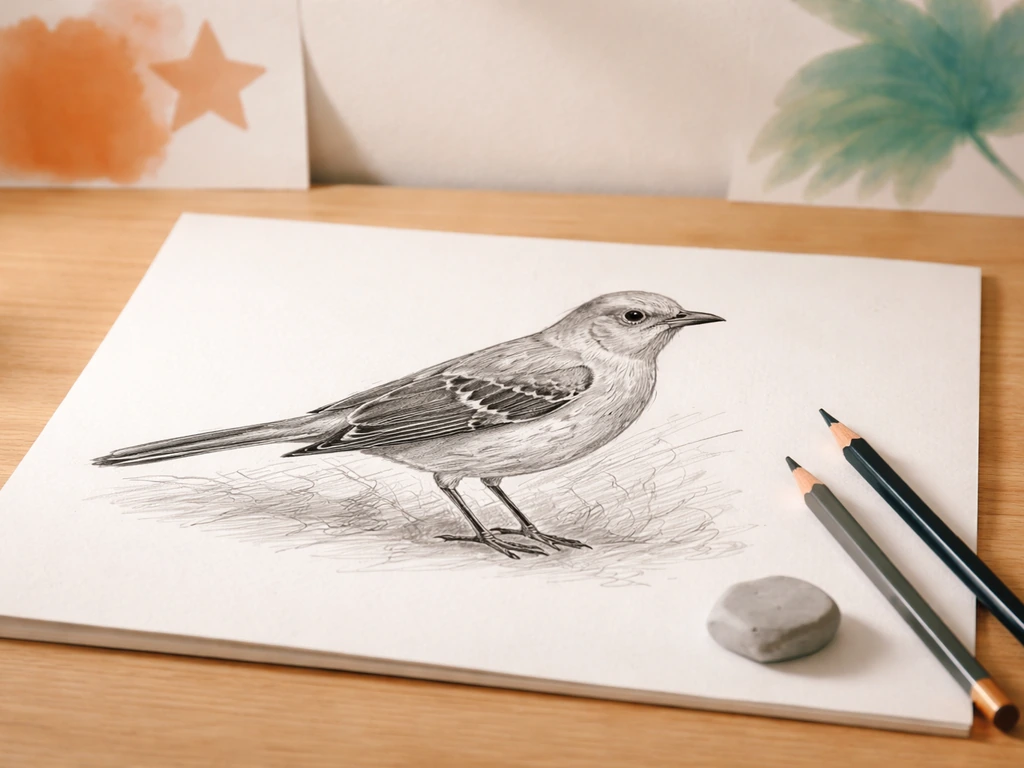
Good bird drawing starts with observation, not pencil marks. Spend a few minutes studying reference images of the northern mockingbird before you draw anything. You're looking for the overall silhouette, the key proportions, and the two or three markings that make this bird immediately recognizable. The NPS Cabrillo National Monument page lists northern mockingbird length around 9 inches and wingspan around 11.5 inches, which you can use as an approximate measurement for proportions. Here's what stands out on a northern mockingbird:
- Overall color: soft gray on the back and head, paler gray to white on the underside, with no strong color contrasts anywhere on the body
- Two white wing bars on each folded wing, plus a white crescent-shaped patch at the base of the primary feathers
- Long dark gray tail with bright white outer tail feathers that flash when the bird moves or fans its tail
- Slender, slightly curved bill typical of a songbird, not as thick as a thrush or as thin as a warbler
- Long legs relative to body size, giving it an upright, alert posture when perched
- Medium body size, roughly 8 to 11 inches long, with a noticeably long tail making up a good portion of that length
The white wing patches are the single most important feature to get right. They're visible even on the folded wing and become very prominent when the bird spreads its wings. If your drawing captures the gray body, the two white wing bars, and the long tail with white outer edges, most viewers will immediately recognize it as a mockingbird. The Cornell Lab of Ornithology’s All About Birds field marks for the northern mockingbird include blank" rel="noopener noreferrer">white wingbars, a visible white patch on perched birds, and white outer tail feathers in flight.
A general method that works for any state bird
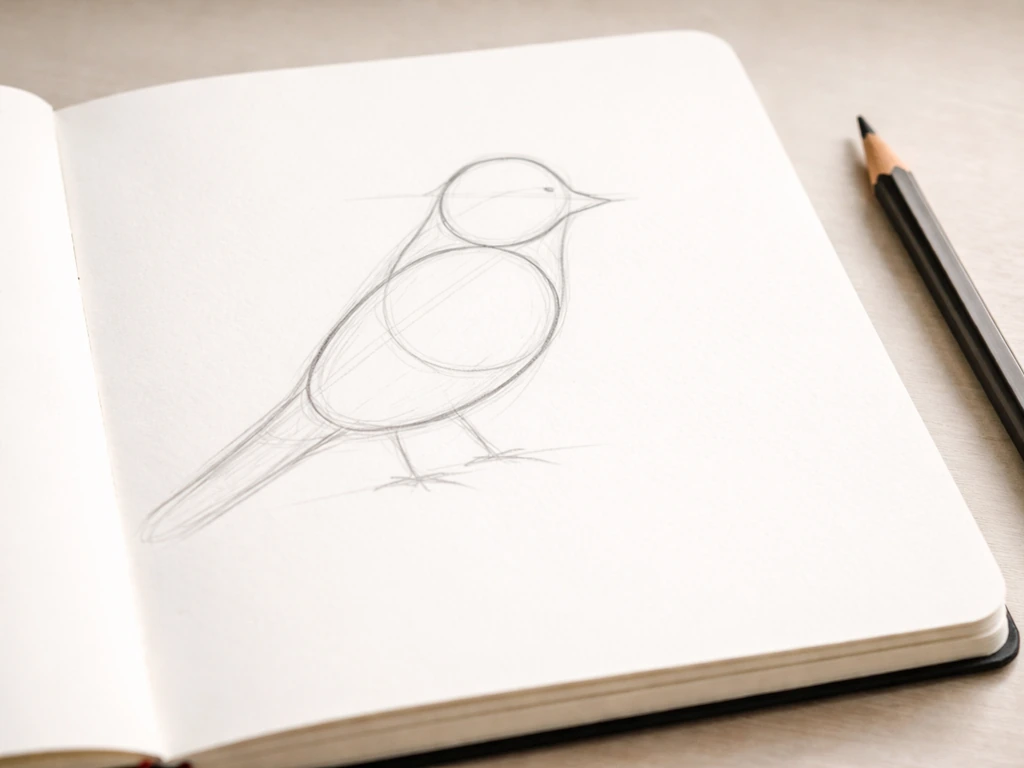
The sketch-to-shape approach is the most reliable way to build an accurate bird drawing from scratch. Start loose and structural, then refine. Trying to draw details before you have the right proportions is the most common beginner mistake, and it's hard to fix once you're committed to a line.
- Block in the body with two overlapping ovals: a larger one for the chest and belly, and a smaller one for the head. The head oval should sit at roughly a 45-degree angle relative to the body oval to suggest posture.
- Lightly sketch the tail as a long rectangular shape extending from the rear of the body oval. For a mockingbird, make this tail noticeably long, at least as long as the body itself.
- Add a short, gently curved triangle for the bill, positioned at the front of the head oval. Keep it slim and slightly downward-angled.
- Sketch the wing as a flattened teardrop shape overlapping the body oval on each side. At this stage you're just placing it, not detailing it.
- Draw two thin legs dropping from the lower body oval, ending in small grasping feet. If the bird is perched on a branch, sketch the branch lightly as a simple cylinder.
- Once proportions look right, begin refining the outer contour: smooth the head into the neck, taper the tail, and define the wing edges. Erase your original oval guides as you firm up the outline.
- Add the key markings: two horizontal white bars across the folded wing, the white crescent patch near the base of the primaries, and the light outer edges along the tail feathers.
- Work feather texture in groups, not individually. Suggest the wing coverts as a cluster, the primaries as layered shapes at the wing tip, and leave the body relatively smooth with light directional strokes.
Keep your early lines light enough to erase. A light hand in the first three steps saves a lot of frustration later. The goal of the construction phase is just to nail the proportions and posture; none of those lines need to survive into the finished drawing.
Drawing the Texas state bird: the northern mockingbird
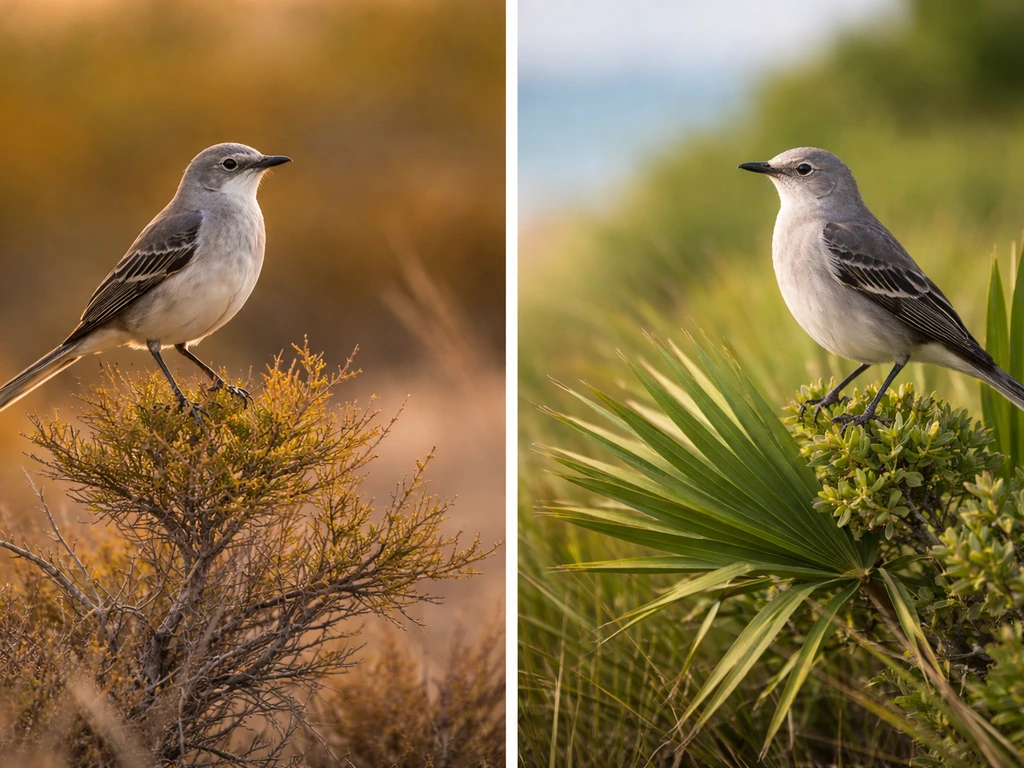
Texas adopted the northern mockingbird in 1927, and it's an appropriate choice for a state with huge habitat diversity. The bird is found across nearly all of Texas year-round, which is part of why it resonated with legislators. When you're drawing it as the Texas state bird, think about capturing the bird's confident, upright posture. Mockingbirds are bold and territorial, and that shows in how they carry themselves, chest slightly forward, tail sometimes cocked upward.
For a Texas-themed drawing, a classic perched pose works well. Place the bird on a short branch or fence post, standing tall with the tail dropped straight down or slightly angled. Use the construction method above to block in the proportions, then focus on these Texas-specific visual priorities:
- Keep the overall body color a flat medium gray on the back and wings, shading to near-white on the throat and belly
- Draw both white wing bars clearly: they run horizontally across the folded wing and are crisp, not blurry or gradual
- The white crescent patch at the base of the primaries sits just below the wing bars and is a slightly different shape, more curved and compact
- The tail feathers should be dark gray at the center, transitioning to clearly white on the outer-most feathers on each side
- The eye is small and dark, sitting near the top of the head with a faint pale eye-ring that you can suggest with a thin light line
- The bill is medium-length and slightly decurved, darker on the upper mandible and lighter below
Don't overwork the gray body areas. One of the most common mistakes when drawing mockingbirds is adding too much texture to the back and breast, which makes the bird look dirty or heavily streaked. The northern mockingbird is a clean, understated gray. Let the white markings do the visual work.
Drawing the Florida state bird: same species, same details
Florida designated the mockingbird on April 23, 1927, just a few months after Texas. It's the same species in both states, Mimus polyglottos, so the drawing is identical in terms of anatomy and markings. What you can vary is context and pose. Florida mockingbirds are often depicted on flowering branches, palm fronds, or in more open compositions that suggest a warmer, subtropical setting.
If you're drawing this specifically as the Florida state bird, the markings and proportions are exactly the same as the Texas version. Use the same construction method and the same emphasis on white wing bars and tail pattern. Where you can add Florida-specific flavor is in the environment: a simple suggestion of a palm branch or a background wash of warm color gives context without changing the bird itself.
One thing worth noting for Florida drawings: mockingbirds in Florida are frequently seen with their wings partially spread, which shows off those white wing patches dramatically. A wings-slightly-raised pose is more challenging to draw but very striking, and it really emphasizes the field marks that define the species. If you want to try it, block in the wings as two asymmetrical rounded shapes angled slightly away from the body, then add the white patch at the base of the primaries as a broad white wedge.
Since both Texas and Florida share the mockingbird, it's worth confirming your state if you're drawing this for a specific assignment. There are guides on this site for other states' birds too, including how to draw the California state bird and how to draw the Colorado state bird, which are completely different species with their own visual challenges.
Finishing touches: shading, feather texture, and what to avoid
Once your outline and key markings are in place, shading is what gives the bird volume. For the northern mockingbird, work with light, directional hatching strokes that follow the feather direction: downward and slightly backward on the head, sweeping back and downward on the body, and layered at the wing tip where the primaries overlap each other.
- Use heavier line weight on the lower edges of forms (the belly, the underside of the tail, the bottom of the wing) to suggest weight and volume
- Keep the upper back and crown lighter in shading value than the wings to suggest the natural color difference between the paler gray back and slightly darker wings
- Leave the white wing bars and outer tail feathers completely unshaded or use only the very lightest possible tone to keep them reading as white
- Suggest feather groups with short, slightly curved strokes rather than drawing individual feathers; on the body, feathers are small and soft and the texture should be subtle
- Avoid heavy cross-hatching on large body areas; it makes the bird look dirty and adds visual noise that competes with the clean white markings
- For the eye, draw a small dark circle with a slightly lighter ring around it; keep it simple and don't make it too large relative to the head
- If you're adding a branch, keep it simple: a few curved lines suggesting bark texture is enough; a complicated background will pull focus from the bird
The most common finishing mistake is over-detailing. A bird drawing doesn't need every feather, every barb, or photographic shadow. A mockingbird drawn with clean proportions, accurate white markings, and restrained shading will look more convincing than one that's been worked to death with texture. Know when to stop.
Where to go from here
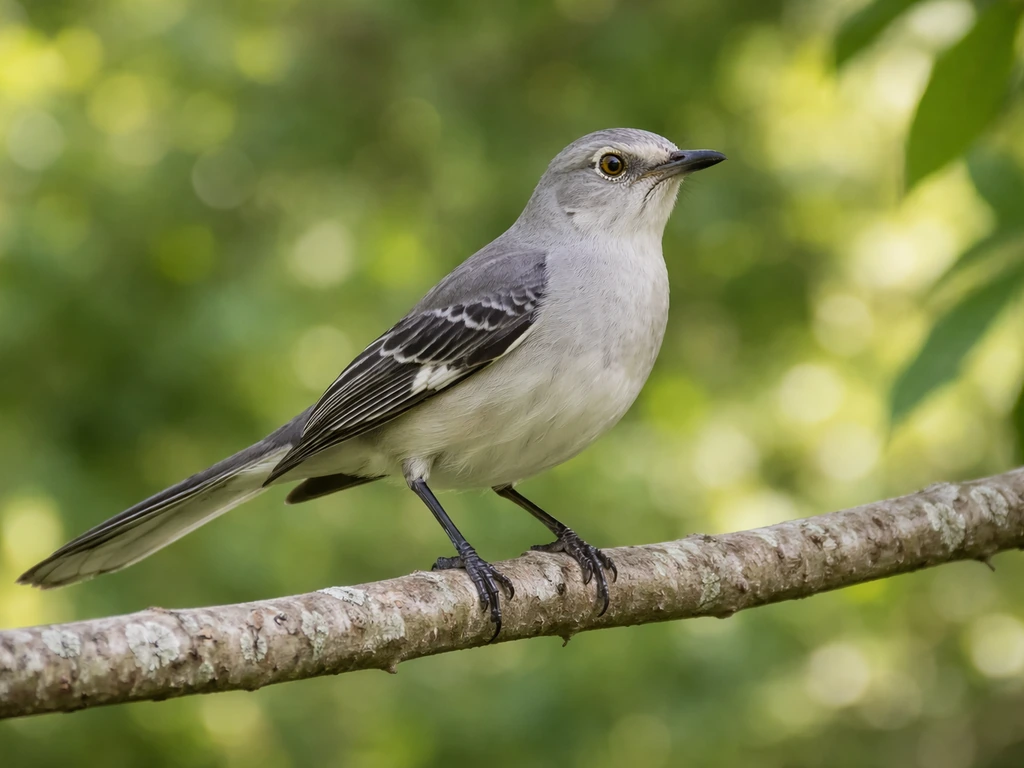
The best next step is to draw from a real reference photograph, not from memory or a cartoon. Look up a clear field-guide quality photo of the northern mockingbird in a perched position, one where the wing bars are visible, and use it alongside this guide. Your first attempt doesn't need to be perfect; the goal is to train your eye to see the proportions and markings before your hand tries to reproduce them.
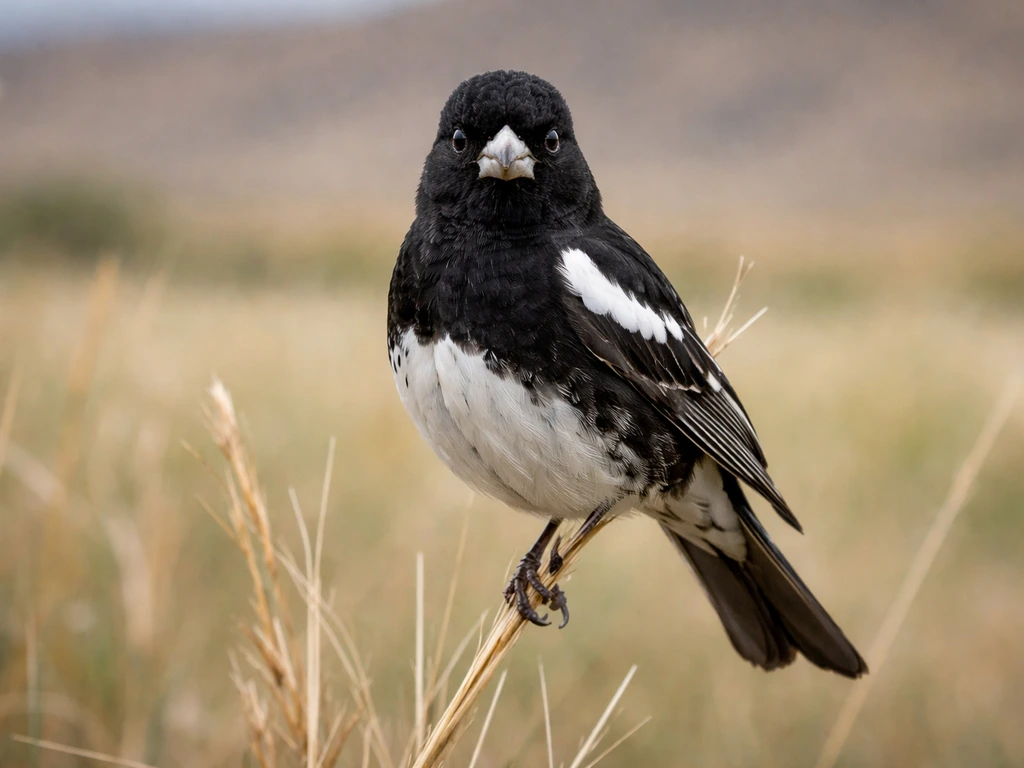
If you want to explore other state birds, the drawing challenge varies a lot by species. You can use the same process and reference photos to capture what makes Colorado's state bird the lark bunting unmistakable Colorado state bird. The Colorado state bird, the lark bunting, is a dramatically different-looking bird with bold black-and-white coloring in the male, which makes it a very different drawing exercise from the subtle grays of the mockingbird.
If you are wondering why the lark bunting is Colorado's state bird, it comes down to the bird’s strong connection to the state's open habitats. The California state bird, the California quail, has a distinctive head plume and round body shape that requires a different set of construction shapes entirely. Branching out to different species is a great way to improve because each bird forces you to think differently about silhouette and proportion.
For accuracy on any state bird, start by confirming the official species on a reliable state-by-state reference, especially for states where the same bird is shared across multiple designations. The northern mockingbird is a good example: if someone asks you to draw "the state bird" without specifying which state, there are five possible correct answers. Getting the species right before you draw a single line is the most important step in the whole process.
FAQ
What if my assignment says “the state bird” but doesn’t mention Texas or Florida specifically?
Check the worksheet prompt for which state it names. If it truly says “the state bird” with no state specified, you should ask for clarification because multiple states can share the same species (for example, the northern mockingbird is a valid state bird for more than two states).
If I’m drawing Texas or Florida, do I need to change the bird’s anatomy or only the scene?
For the northern mockingbird, keep the anatomy and proportions the same. Focus changes on pose and background context (a fence post or short branch for a classic Texas feel, a palm frond or warm background wash for Florida), not on altering the bird’s structure.
How do I draw the white wing patches without them looking like paint blobs?
Treat the wing patches as defined shapes with crisp edges that sit under the gray wing surface, then let shading around them imply depth. Avoid adding texture inside the white areas, keep the gray body clean, and place the patches so they match the visibility on a folded wing versus a partially spread wing.
Do I always need a perched pose, or can I draw the northern mockingbird in flight?
You can draw it in flight, but the wing bars become the priority, and the tail shape will be harder to track. If you want easier accuracy, start with a perched reference photo where the tail and both wing markings are clearly visible, then try flight once your proportions are consistent.
What’s the safest way to fix proportions if my first construction sketch looks off?
Use lighter construction lines longer than you think. If the body looks too long or the tail angle feels wrong, erase back to the shape stage and adjust proportions before adding any markings or shading, since details lock in errors later.
How should I handle the “wings partially spread” look for Florida, especially if my wings overlap awkwardly?
Block both wings as simple, asymmetrical rounded forms first, angled slightly away from the body. Then add the white patch at the base of the primaries as a wedge shape, not a streak, so the patch reads clearly even with partial wing overlap.
How much feather detail is too much for a convincing state bird drawing?
If you can see individual feather lines everywhere, you likely overworked it. Keep feathering directional for form only (light, following the feather direction), and stop once the silhouette, wing bars, and clean gray-to-white contrast look correct.
What reference photo should I choose for the northern mockingbird to get the best results?
Pick a clear field-guide style photo in a similar pose to your plan (perched for an easier drawing, wings slightly raised if you’re aiming for the Florida feel). Ensure both wing bars are visible and the tail outline is unobstructed.
Can I draw the Texas and Florida versions as two different birds in a series?
Not if you want them to remain accurate. Since Texas and Florida share the northern mockingbird, keep the same species features and markings in both, then differentiate the drawings with different environments, lighting warmth, and posture.
How do I avoid making the bird look “dirty” when shading the back and breast?
Limit heavy hatching and reduce texture density on the gray body. Let the contrast come from smooth gray form and clean white wing and tail edges, with only enough shading to show volume rather than to imply lots of streaking.
If I want to draw another state bird next, how do I know the method will still work?
The construction-first approach carries over, but the biggest change is always the silhouette and the standout field marks. Before drawing, identify the one or two defining features in the new bird (like a plume, wing pattern, or tail shape) and prioritize those over minor texture.
Next Articles
What Is the State Bird of Illinois? Identification Guide
Learn Illinois state bird details, why it became official, key ID tips, and where to spot it in Illinois.
What Is Colorado’s State Bird? Identification and Facts
Colorado’s state bird is the Lark Bunting. Learn how to identify it, why it was chosen, and fun related facts.
Which Is Karnataka State Bird? Identification and Facts
Discover Karnataka’s official state bird, key ID traits, where to spot it, and why it was chosen.