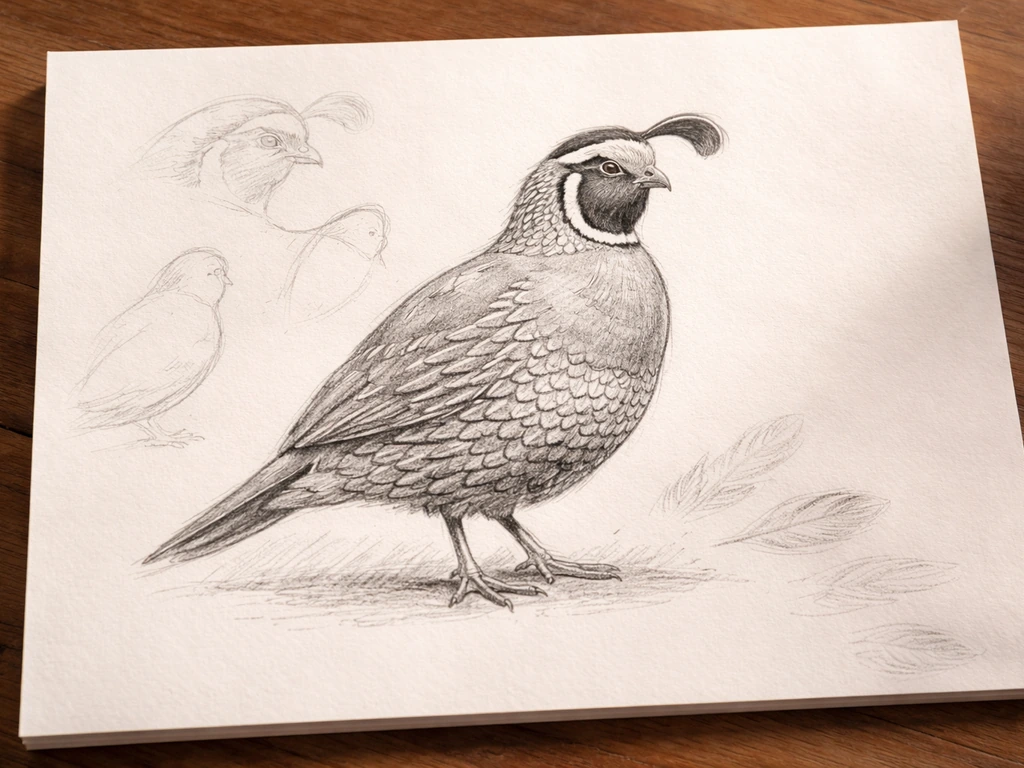
You're drawing the California Valley Quail (Callipepla californica), California's official state bird since 1931. It's a small, plump, round-bodied bird about 9.8 inches long, most recognizable by its drooping forward-curving crest, black-and-white face pattern on the male, scalloped belly, and short tail. Get those four elements right and your drawing will be unmistakably a California quail.
How to Draw the California State Bird Step by Step

Marcus Webb
7 May 2026
Which bird you're drawing (and why it matters)
California's state bird is officially named the California Valley Quail, codified in California Government Code Section 423 as the 'official bird and avifaunal emblem of the State. California Government Code Section 423 states that the blank" rel="noopener noreferrer">California valley quail is the official bird and avifaunal emblem of the State. ' It was designated by Assembly Bill 776, Chapter 777, back in 1931. You'll also see it called the California quail or valley quail, with the scientific name Callipepla californica (sometimes listed as Lophortyx californica in older references). All the same bird. If you've been looking up 'California quail' for reference images, you're in the right place.
Gather good references and set up your space
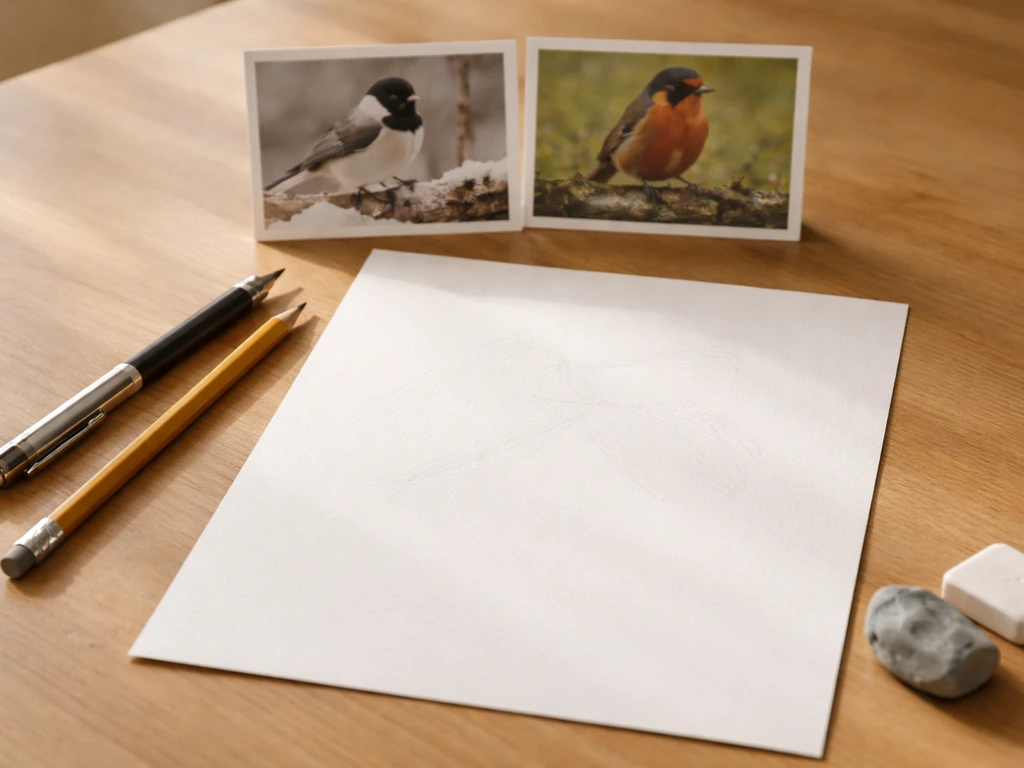
Before you put pencil to paper, find two or three solid reference photos. Look for images taken in soft morning or evening light rather than harsh midday sun, which creates too much contrast and washes out the bird's plumage detail. Photos taken at the bird's eye level are the most useful for proportions. Field guide illustrations, especially plates from the Audubon or Cornell Lab collections, are even better than photos for beginners because the lighting is controlled and the markings are clearly rendered.
For your drawing setup: use a mechanical pencil or an HB pencil for initial sketching, a 2B or 4B for shading, and a good eraser (kneaded erasers are ideal for lightening lines without tearing paper). A blank sheet of printer paper works fine for practice; use cartridge or Bristol paper if you want a cleaner finished piece. Keep your reference image at the same scale as your drawing if possible, propped up nearby so you're not constantly looking down at a phone.
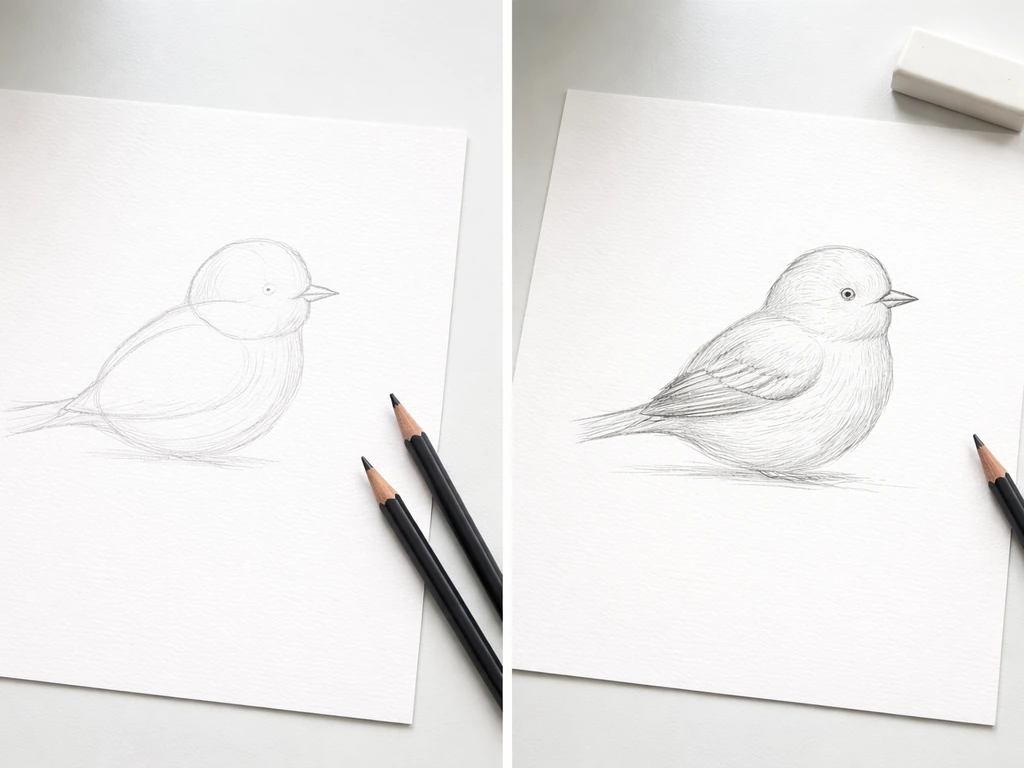
Start with shapes and proportions, not details
The single biggest beginner mistake in bird drawing is starting with the eye or beak before the overall shape is locked in. Do the opposite: think in blobs first. For the California quail, the body is a wide, somewhat egg-shaped oval, heavier at the back and tapering slightly toward the front. The head is a smaller, rounder circle sitting on top and slightly forward of the body. Draw these two shapes lightly in pencil. The body oval should be noticeably wider than it is tall, reflecting the bird's stocky, ground-hugging posture.
Next, draw a light axis line through the head to indicate where the bill will point. This locks in the direction the bird is facing before you add any features. Then sketch a short horizontal line at the base of the body where the legs will attach, and a small stub at the rear for the short tail. The tail on a California quail is notably short, so keep it compact. At this stage your drawing should look like two simple overlapping shapes with a few directional lines. That's exactly where you want to be.
One useful trick from bird illustrators: look at the negative space around your shapes (the blank paper surrounding the bird outline) to check proportions. If the silhouette of your quail looks too tall and narrow, squish the body oval horizontally. If the head looks too large relative to the body, shrink it. Getting these proportions right now saves you from having to fix a distorted drawing after you've added all the details.
The features that make it recognizably a California quail
Four markings define this bird. Get them right and nothing else really matters for recognition purposes.
The crest (topknot)
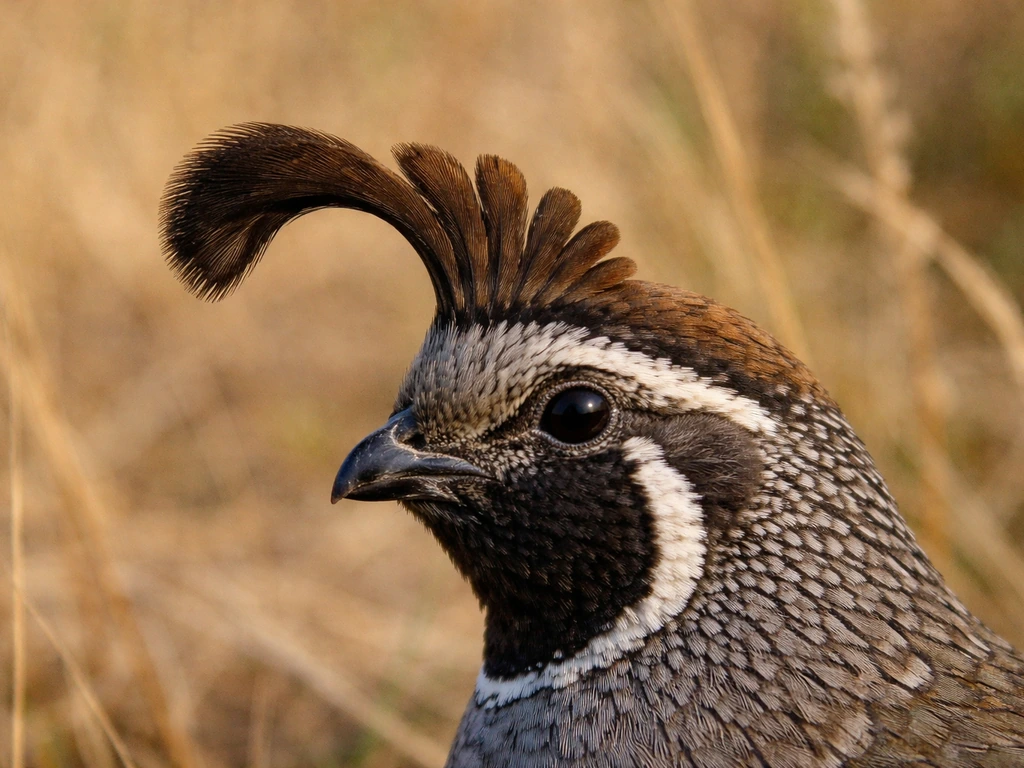
The crest is the California quail's most iconic feature. It's a cluster of six feathers (appearing as a teardrop or comma shape) that curves forward from the top of the head and droops slightly downward toward the bill. On males it's black; on females it's brown. Draw it as a single curved, comma-like plume rather than individual feathers. It should sit near the top-front of the head circle and lean forward, not straight up. A crest that points straight up or curves backward will look like a different bird entirely.
The face and throat
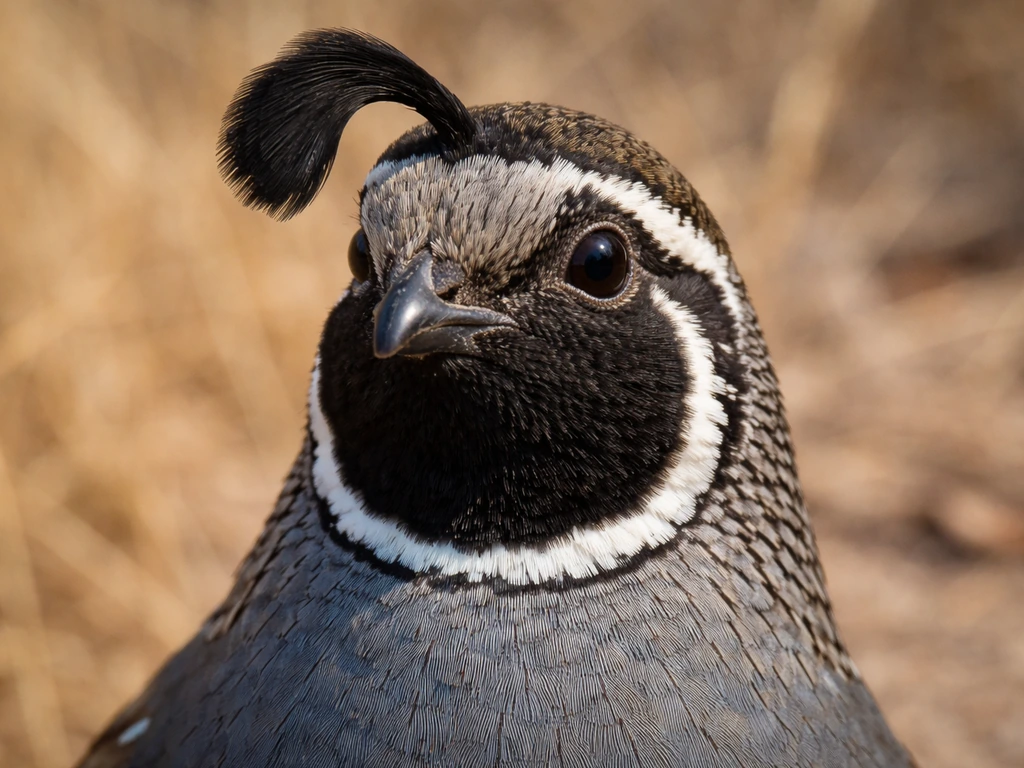
On a male, the face is one of the most striking patterns of any North American quail: a black throat and face mask, bordered cleanly by white lines above and below. There's typically a white stripe above the eye and a white stripe along the lower jaw. The forehead is also white. This black-and-white contrast is bold and graphic. Keep the shapes clean and clearly bounded. On females, the face is a softer brown-gray without the strong contrast. If you're drawing the male (which is the more commonly depicted version), spend time getting the white border shapes accurate before you fill in the black.
The belly and flanks
The underside of a California quail has a scalloped or scaled appearance, created by feathers that have dark edges against lighter centers. The flanks (sides of the body) are brown with white streaks. This is not solid dark coloring, and it's not a simple gradient. Think of it as a fish-scale pattern: overlapping curved arcs of light edged in dark. You don't need to draw every individual scale, but you do need to suggest this texture in rows, especially toward the lower belly. If you render the underside as a uniform solid tone, the bird will look like a generic quail rather than the California species.
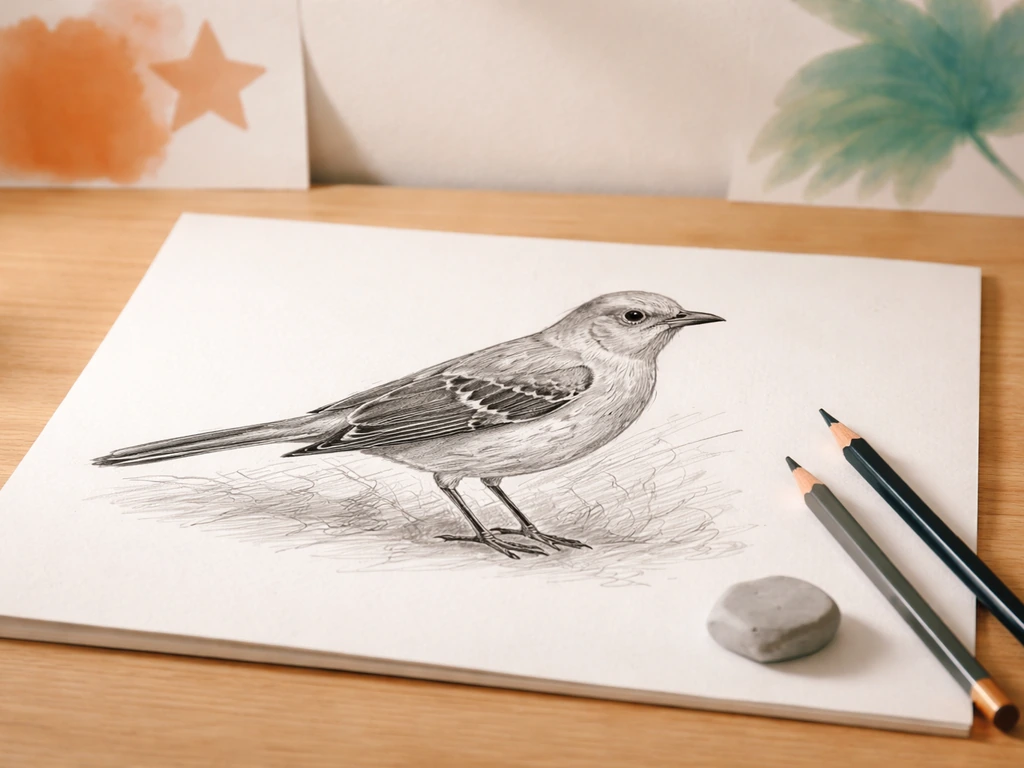
Wings, tail, and legs
The wings are rounded and short, sitting close to the body. Audubon describes the wing shape as 'fingered, rounded, short,' which tells you to keep wing outlines compact rather than drawn out to a point. The tail is stubby and square-ended. Draw it short. The legs are thin and slightly long relative to the body, which is typical for a ground-dwelling bird that spends most of its time walking rather than perching. Draw three toes pointing forward and one pointing back, kept simple without overdoing the joint angles.
From rough sketch to finished drawing
- Sketch the body oval and head circle lightly with an HB pencil. Keep lines very light so they erase easily.
- Add the axis line for the bill direction, a rear stub for the tail, and short leg lines below the body.
- Refine the outer contour of the body and head into a more natural bird silhouette, slightly softening the geometric shapes into curves.
- Place the crest on top of the head, curving forward. Add the eye as a small circle just above the midline of the head.
- Draw the face markings: map out the white forehead patch, the black face mask/throat area, and the white border lines while keeping the edges clean and bold.
- Sketch the wing outline against the body (keeping it rounded and compact), the short tail stub, and the leg/toe structure.
- Erase all guide lines that are no longer needed. Your clean outline should now be complete.
- Begin shading using a 2B pencil. Follow the 'always start light and go darker' rule: lay down a light base tone across the gray-brown upper parts first.
- Add the scalloped belly texture by drawing rows of small curved lines or arcs that suggest feather edges, darkening at the borders and leaving the centers lighter.
- Deepen the black areas (throat, face mask, crest) last, since those are the darkest values in the drawing. Use hatching or firm pencil strokes rather than smearing.
If you want to go further with shading, use hatching (parallel lines) or crosshatching (crossing line layers) to build up value in the darker areas of the wings and back. Short marks that follow the direction feathers would grow look more natural than random scribbling. The goal is to suggest feather groups and texture, not to map every single feather barb.
Options for different skill levels, plus mistakes to avoid
Quick sketch (beginner)
If you just want a recognizable, clean drawing without heavy rendering, stop after step 8 above. A clean line drawing with the crest, face markings, and suggested scalloping on the belly reads clearly as a California quail. You can fill in the throat and crest with solid pencil or ink. This approach takes 15 to 20 minutes and is a great starting point.
Detailed drawing (intermediate)
Work through all ten steps and spend extra time building up tonal layers. Use a blending stump or fingertip to smooth out the gray-brown tones on the body, then go back in with a sharp pencil to re-crisp the scallop edges and the face pattern borders. Add subtle streaks in the flanks to show the brown-and-white striping. At this stage, the quality of your reference image really matters, so use a clean field guide plate or a well-lit photo with soft directional light.
Common mistakes to watch for
- Crest pointing straight up or backward: the California quail's topknot droops forward. If yours looks like a party horn pointing up, rotate it toward the bill.
- Starting with details before proportions: drawing the eye and face markings before the body shape is correct leads to a bird that looks oddly distorted once you add the body around it.
- Solid dark belly: if you shade the underside as a flat dark tone, you lose the scalloped/scaled signature pattern. Use arc-shaped marks in rows instead.
- Wings too long or pointed: keep the wing silhouette rounded and compact against the body. Long pointed wings make a quail look like a dove or pigeon.
- Tail too long: California quail have short, stubby tails. Over-extending the tail changes the whole silhouette.
- Copying every feather from a photo: photos at high resolution show individual feathers, but drawing each one produces a cluttered, unnatural result. Suggest groups of feathers, not individual barbs.
Why California chose this bird
The California Valley Quail was designated the state bird in 1931, making it one of the earlier state bird adoptions in U. Illinois has its own official state bird as well, the answer to the question you are looking for official state bird of Illinois. S. history. It's a native species deeply associated with California's varied landscapes, from coastal scrubland to oak woodland and Central Valley grassland. It's also a highly social bird, often seen in groups called coveys, and was well known to both indigenous Californians and early settlers as a common, characteristic presence across the state. The bold, immediately recognizable silhouette with that distinctive crest made it a natural choice as an emblem. Today it remains one of the most visually iconic state birds in the country, which is part of why it's such a satisfying subject to draw.
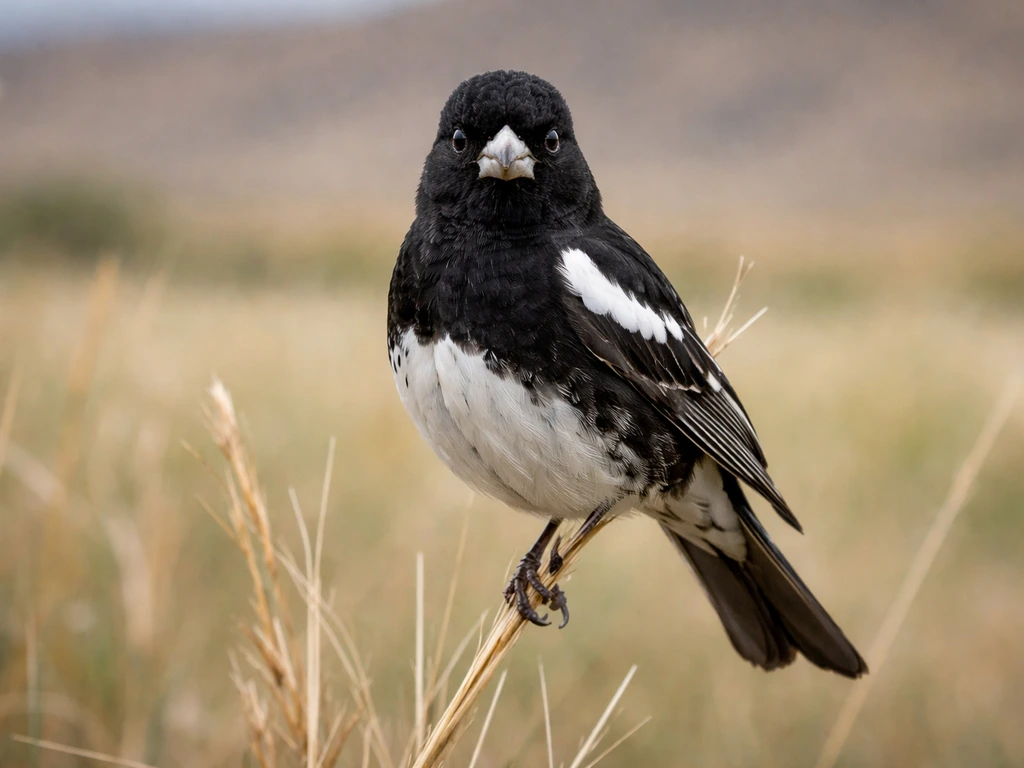
If you're exploring state birds more broadly, California's quail makes an interesting comparison to neighboring states. If you specifically want to learn how to draw the Colorado state bird, use the same shapes-and-proportions approach and then focus on its key markings. Colorado's state bird, the Lark Bunting, sits in a completely different visual category, a small songbird rather than a plump quail, and drawing it involves a very different set of proportions and markings. Colorado’s state bird is the Lark Bunting, a small songbird that looks quite different from the California quail Colorado's state bird. The step-by-step approach for blocking in body shapes and working from proportions to details applies equally well regardless of which state bird you're tackling next.
FAQ
Should I draw a male or female California valley quail for the most “official” look?
Most depictions are males because the crest and face mask are high-contrast black and white, with cleaner borders. If you choose a female, simplify that mask into softer brown-gray tones and a less sharply bounded stripe pattern, while keeping the same drooping comma-shaped crest and stocky oval body proportions.
What if my crest looks wrong even after I place it on the head?
The crest is recognizable by its direction, not just its shape. Aim it forward from the top-front of the head circle, and let it droop toward the bill. If it curves backward or sits too upright, your bird will read as a different species even if the face markings are accurate.
How do I place the bill and make it look like the bird is facing the right way?
Use the axis line through the head early, then build the bill off that direction. Keep the bill relatively short and align it with the head angle you set in the sketch, rather than drawing the bill in first and then trying to “bend” the head to match.
Can I draw it from a side view, or is this only for a front-facing bird?
You can draw side views, but keep the same body logic: wide egg-shaped body (wider than tall), compact short tail, and crest that still droops forward from the head. For a profile, reduce the face mask to its visible stripe edges and keep the underside scalloping suggested rather than fully frontal.
What’s the best way to get the scalloped belly texture without overworking it?
Treat the underside as rows of curved arcs, dark-edged lines with lighter centers, focused more toward the lower belly and flanks. A few strong rows often read better than many tiny “scales.” Aim for texture cues that follow feather growth direction, not a full scale-by-scale map.
How should I draw the legs and toes if I’m using a simple outline?
Keep the legs thin and slightly longer than the body because this quail is a ground walker. Draw three toes forward and one back, but don’t over-angle the joints. If the feet look too spread or too duck-like, you can lose the species silhouette.
Do I need to draw the wings in detail for it to look like a California quail?
No. The wings should read as rounded, short, and close to the body, so block in the shape first, then add only a few hatch marks in the darker wing and back areas. Over-extending wing outlines into long points will make the posture feel wrong.
How can I fix proportions after adding facial markings?
Check the silhouette again using negative space, then adjust the underlying blobs before adding more texture. If the body is too tall and narrow, lightly redraw the body oval wider and shorten it, then re-establish the crest and face border shapes on top. Trying to “correct” with shading alone rarely works.
What paper and pencil setup works best if I want to finish in pencil only?
Use an HB or mechanical pencil for the initial construction and outline, then limit shading to 2B to 4B with a blending stump for the gray-brown body. For the crisp face borders and crest edges, switch back to a sharper pencil so those graphic shapes stay clean rather than becoming smudged.
I want a clean finished line drawing. When should I stop?
Stop after you’ve locked in the silhouette and the four recognition markings (crest, male face mask or softer female pattern, scalloped belly suggestion, and compact wing and tail shapes). At that point, you can finish by filling the throat and crest more solidly, and add just enough scallop texture to keep the underside from looking flat.
Next Articles
How to Draw the State Bird: Texas and Florida Guide
Step-by-step guide to draw the Texas and Florida state birds with correct species ID, shapes, markings, and finishing ti
What Is the State Bird of Illinois? Identification Guide
Learn Illinois state bird details, why it became official, key ID tips, and where to spot it in Illinois.
What Is Colorado’s State Bird? Identification and Facts
Colorado’s state bird is the Lark Bunting. Learn how to identify it, why it was chosen, and fun related facts.