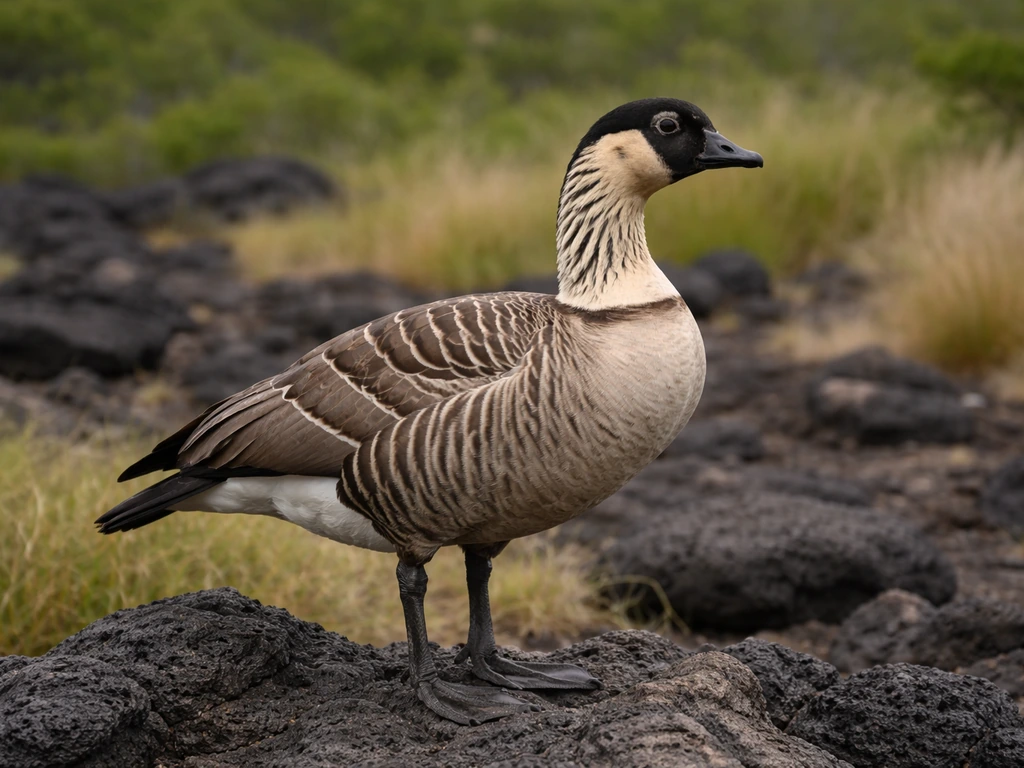
You're drawing the Nēnē, Hawaii's official state bird. Formally designated under Hawaii Revised Statutes § 5-17 as Branta sandvicensis (the Hawaiian goose), the Nēnē is a medium-sized goose blank" rel="noopener noreferrer">about 65 cm (25 inches) long with a jet-black head, a pale yellow-to-white neck covered in black streaks, and a dark gray-brown body marked with diagonal rows of lighter barring. Get those three zones right, black head, pale streaked neck, barred body, and your drawing will be instantly recognizable as a Nēnē rather than a generic goose.
How to Draw Hawaii State Bird: Step-by-Step Guide

Marcus Webb
12 Jun 2026
The bird you're drawing: the Nēnē
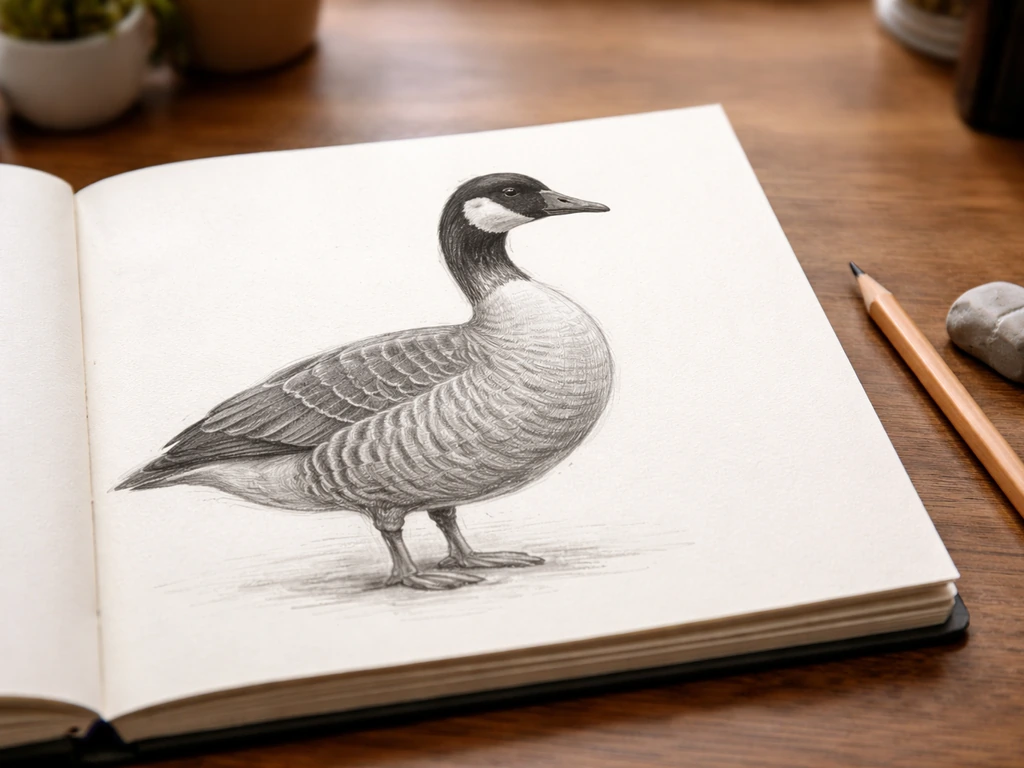
The Nēnē (pronounced nay-nay) is Hawaii's only native goose and one of the rarest birds in the world. It's closely related to the Canada Goose but evolved separately on the Hawaiian Islands, developing reduced webbing on its feet for walking on lava fields rather than swimming. That's actually a useful drawing note: unlike a typical goose sketch you might find in a general tutorial, the Nēnē stands more upright and terrestrial, with sturdy dark legs and feet that sit firmly on the ground rather than a waddle-heavy posture.
If you've also been looking at how to draw other state birds like the Nevada state bird (Mountain Bluebird) or the Arizona state bird (Cactus Wren), you'll find the Nēnē presents a very different challenge: it's a large bird with bold color-block contrasts rather than delicate small-bird proportions. To draw the Arizona state bird, you’ll want to focus on the Cactus Wren’s long tail, bold facial markings, and overall cactus habitat look. If you also want practice on a different style of state-bird drawing, learn how to draw Nevada’s state bird, the Mountain Bluebird how to draw Nevada state bird. The approach is closer to drawing a goose or duck than a songbird.
Key features to lock in before you start sketching
Before putting pencil to paper, spend a few minutes really looking at what makes a Nēnē a Nēnē. There are five visual anchors that separate this bird from any other goose or waterbird sketch.
- Black head, face, crown, and bill: the entire top of the head and the face are a solid, deep black with no gradients — this is your darkest value zone
- Cream-colored cheeks: a patch of cream or light buff sits on each cheek, breaking up the black face; don't skip this or the head reads as a solid black blob
- Pale yellow-to-white neck with black streaks: the neck is dramatically lighter than the body, with vertical black streak lines running through it — this neck contrast is the Nēnē's signature look
- Dark gray-brown barred body: the body is sepia to dark brown overall, with diagonal rows of white feathers creating a barred/striped pattern across the upperparts; the lower body is lightly barred
- White rump, black tail, and dark legs: the rump flashes white (visible from behind or at a three-quarter angle), the tail feathers are black, and the legs and webbed feet are dark — these three anchor the lower body values
The posture is also specific: the Nēnē holds itself fairly upright with its neck extended and alert. It doesn't hunch low to the ground. A side-profile standing pose is the easiest starting point for beginners because it shows all five zones at once.
Materials and reference images: set yourself up before drawing
Reference images to use
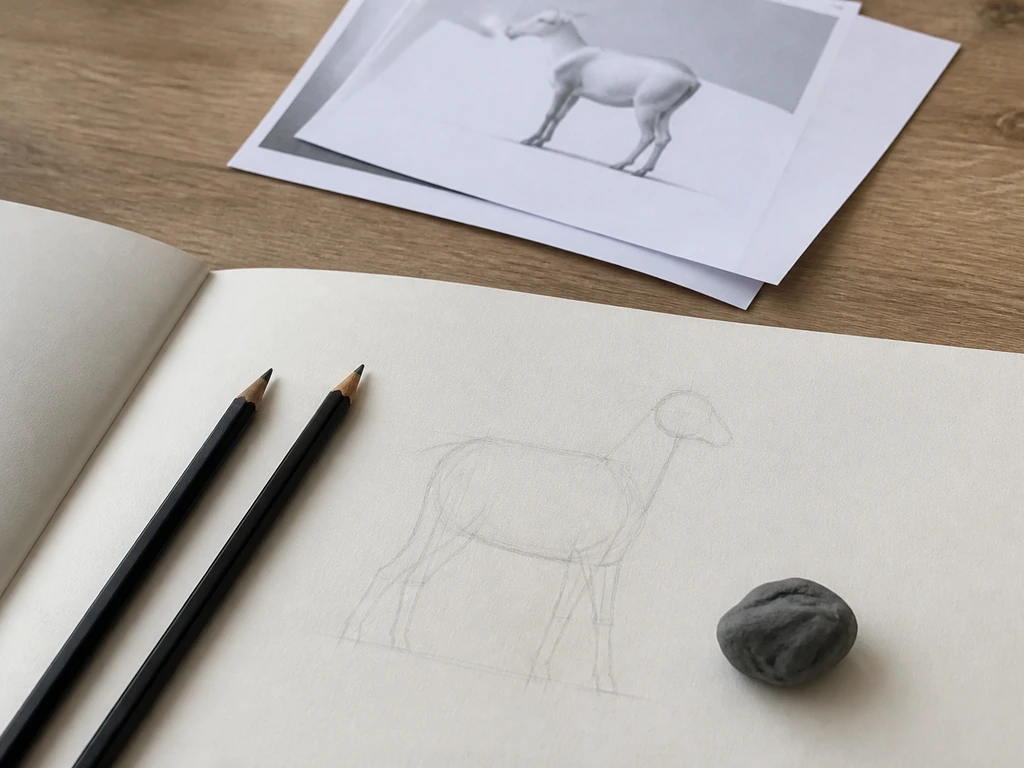
Do not try to draw the Nēnē from memory or from a rough mental image of 'a goose.' The specific markings are too easy to get wrong without a reference. Good free sources include the U.S. National Park Service pages for Haleakalā and Hawaiʻi Volcanoes National Parks (both feature high-quality Nēnē photos), the USGS media pages for Branta sandvicensis, Wikimedia Commons under the category 'Branta sandvicensis,' and the Hawaiʻi Birding Trails species page. Hawaiʻi Volcanoes National Park also provides Nēnē learning resources and photo-based context that can help you match key posture and facial and head patterns National Park Service pages for Haleakalā and Hawaiʻi Volcanoes National Parks. Pull up at least two images: one clean side-profile standing shot (to establish body shape and proportions) and one front or three-quarter view (to capture the face and neck patterning). If you can find a low-angle standing shot, that's ideal for getting the leg and tail alignment right.
Tools and setup
| Tool | Best for | Beginner tip |
|---|---|---|
| HB pencil | Initial light construction lines | Press lightly — you'll erase most of this layer |
| 2B or 4B pencil | Shading the dark head, tail, and legs | These areas go very dark; a softer pencil saves time |
| Kneaded eraser | Lifting highlights on the neck and rump | Dab (don't smear) to keep clean edges |
| Fine-tip pen or 0.5 mm mechanical pencil | Defining feather texture and barring lines | Use after you're happy with the overall shape |
| Digital app (Procreate, Sketchbook) | Experimenting with layers for color zones | Use a separate layer for each value group: black, pale neck, barred body |
Your practice plan: start with three quick gesture sketches (5 minutes each, no detail) just to get the overall silhouette and proportions comfortable. Then do one longer study (20 to 30 minutes) working through the steps below. Most beginners need two or three full attempts before the head-to-neck contrast looks right, so don't expect the first drawing to be the keeper.
Step-by-step construction: proportions and outline first
Always build from big shapes to small details. If you jump straight to feathers and streaks, the proportions will be off and no amount of detail will fix it. Follow this construction sequence with light, erasable pencil lines.
- Draw a large horizontal oval for the body: this is the core mass. Make it roughly 2.5 times as wide as it is tall for a standing side-profile view. The Nēnē is a medium-large goose, so the body oval should dominate your page — don't make it too small.
- Add a smaller circle or oval for the head: placed at the upper-front of the body oval, the head is noticeably smaller than the body, roughly one-quarter the body's width. Connect it to the body with a gently curved neck — the neck should be about as long as the head is wide.
- Rough in the neck as a tapered column: wider at the base where it meets the body, slightly narrower near the head. Leave the neck as a separate shape for now — you'll use it to place the critical pale-neck / black-head contrast later.
- Mark the bill: from the front of the head circle, extend a short, flat, triangular bill shape angled slightly downward. The Nēnē's bill is dark and proportionally shorter and narrower than a Canada Goose's.
- Place the body landmark lines: lightly sketch a curved line across the rear of the body oval to indicate where the tail begins. Mark two short parallel lines descending from the lower-center of the body for the legs. At this stage, just establish their position and angle — the legs are fairly short relative to the body.
- Rough in the wing edge and tail: the wing sits along the top and side of the body oval. Draw a loose curved line from behind the neck junction to the rear of the body for the wing edge. The tail is a short, slightly fanned cluster of feathers extending backward from the rump — keep it compact and pointed slightly downward.
- Step back and check proportions before adding anything else: the head should look small relative to the body, the neck should be clearly distinct from both head and body, and the overall silhouette should read as a ground-dwelling goose, not a long-necked swan or a short duck.
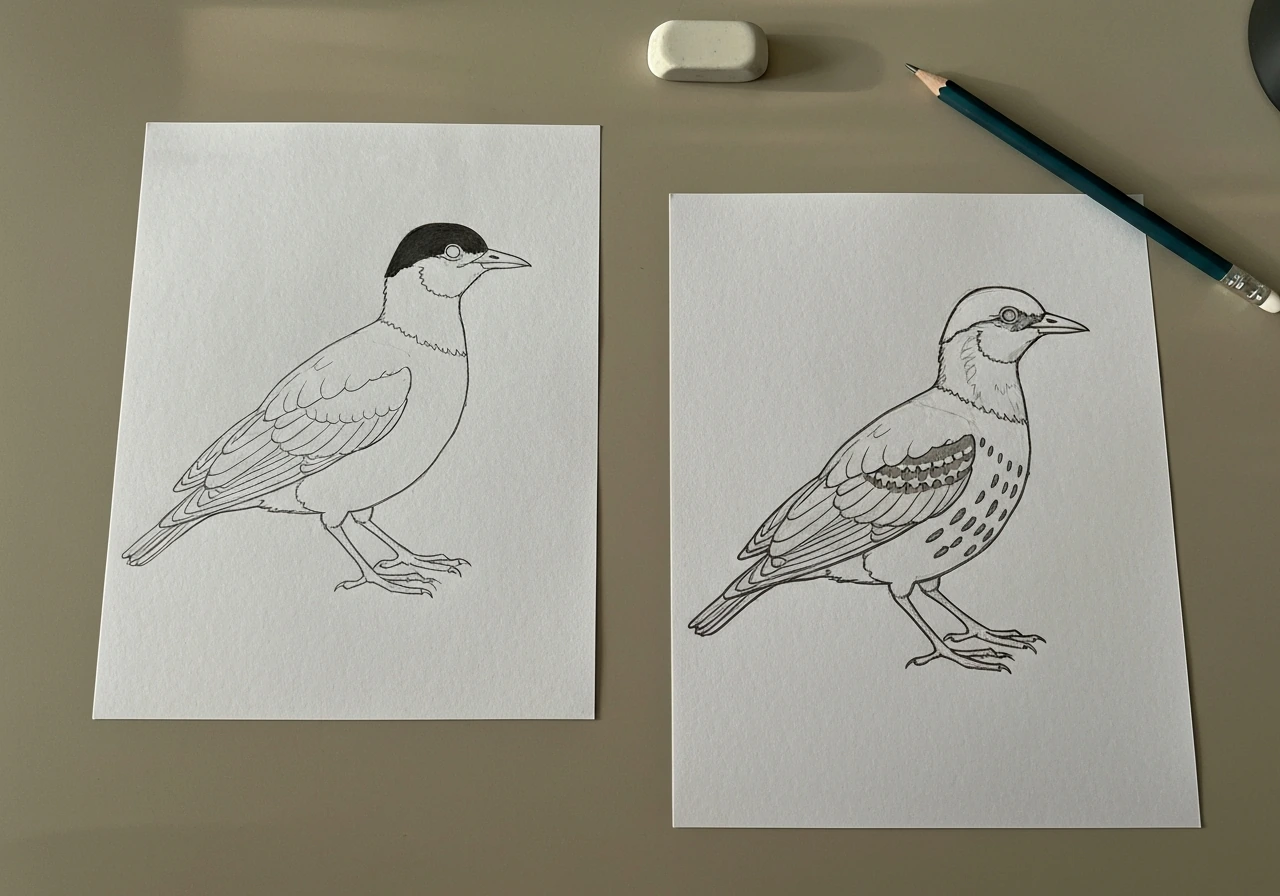
Adding details: markings, wings, tail, and feather texture
Once the construction skeleton is solid, shift to a slightly harder pencil pressure and start placing the defining markings. Work in this order: head zone first, neck second, body barring third, extremities last. This matches the Nēnē's visual hierarchy from most distinctive (black head) to most complex (body texture).
Head and face
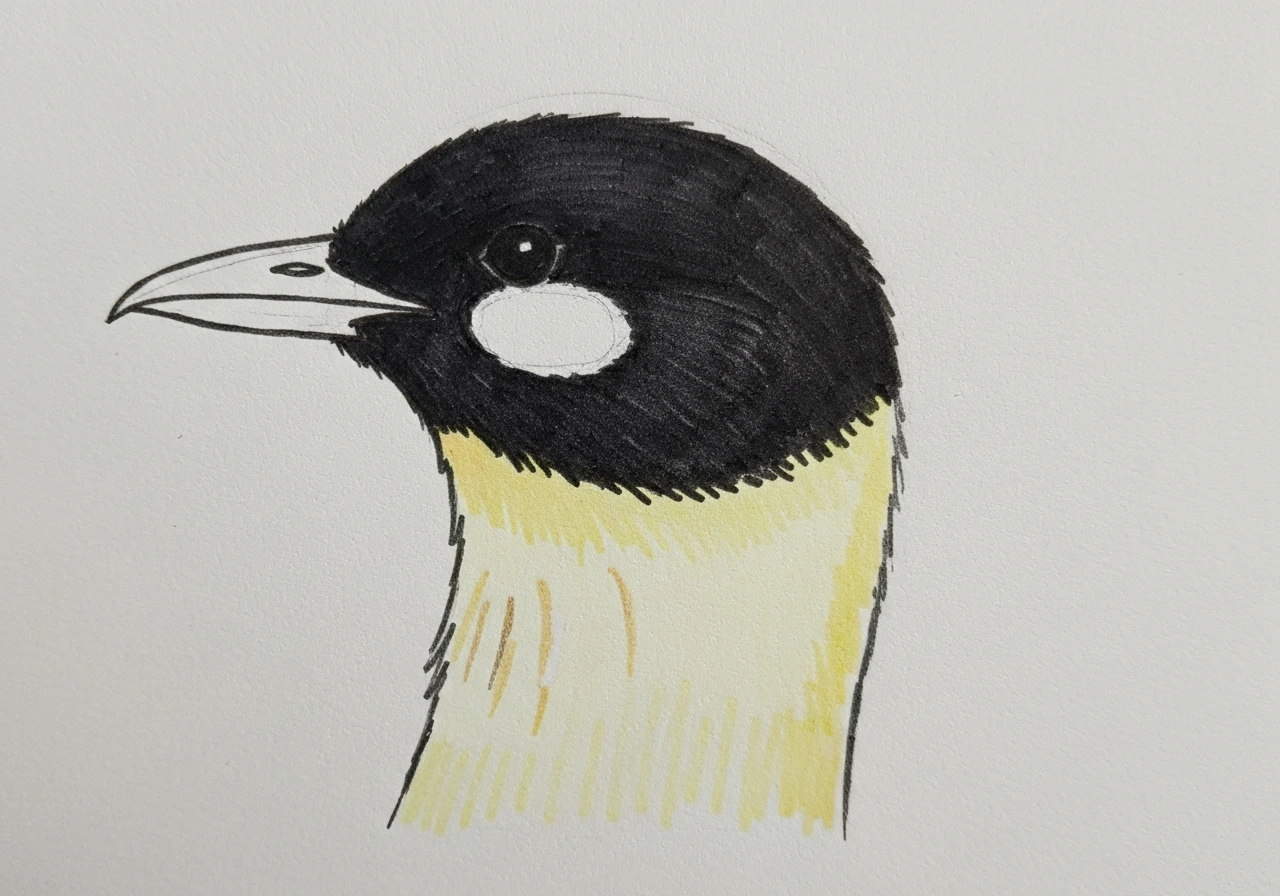
Darken the entire head oval and the bill to a solid deep black. Then, on each side of the head where the cheek sits, leave (or erase) a small oval patch of lighter tone, this is the cream cheek. The cheek patches are not huge; they sit roughly where a human earlobe would be, slightly below and behind the eye. Place the eye as a small circle within the dark head area, just above the cheek patch. The eye itself is dark, but leaving a tiny white highlight dot makes it read as a living eye rather than a flat mark.
Neck streaking
The neck should be noticeably lighter in value than the body, think of it as a pale yellow-to-white column with thin vertical black streak lines running from top to bottom. Draw the neck's base tone lightly, then add a series of fine vertical or slightly diagonal lines in darker pencil over it. Keep the streaks narrow and parallel; they shouldn't be thick bands. This neck is what immediately sets the Nēnē apart from other geese in a drawing, so give it the attention it deserves.
Body barring and wing feathers
The Nēnē's body pattern is created by diagonal rows of white feathers over a darker under-color, which reads as alternating light and dark diagonal bands across the upperparts. Rather than trying to draw individual feathers, use diagonal hatching lines in groups: lay down a band of parallel lines at roughly 45 degrees, skip a gap, then another band. The gaps represent the lighter white feather rows; the hatched bands represent the darker sepia. Keep the lower body (belly area) more lightly patterned than the upper body and back. Along the wing edge, you can add a few larger individual feather shapes for the primary flight feathers, but keep them simplified, long, slightly curved ovals layered on top of each other.
Tail, rump, and legs
The rump (just above the tail) should be noticeably lighter, almost white. This is a real feature, not just a highlight, so make it clearly lighter than the surrounding body. The tail feathers below the rump go back to dark/black. Draw them as a small fan of slightly pointed shapes. The legs are dark to black, fairly short, and end in webbed feet, though the webbing is reduced compared to swimming geese. A simple forked-foot shape at the base of each leg works well for beginners; you don't need to detail every toe.
Shading and finishing touches for realism
Shading a Nēnē is actually very approachable once you see it as a value map. There are really only three value groups to manage: very dark (black head, bill, tail, legs), mid-dark (the barred body in sepia tones), and light (the pale neck, cream cheeks, white rump). Everything else is a transition between these.
- Fill in the darkest areas first: use your 2B or 4B pencil to solidly shade the black head/bill, the tail feathers, and the legs and feet. These anchor the drawing's value range and make every other tone look correct by comparison.
- Establish the pale neck: keep this area very light. Use a barely-there HB tone with fine vertical streak lines over it. If you have a kneaded eraser, lightly dab the neck area to brighten it further.
- Build the body barring in layers: start with a medium-gray overall wash across the body (light even hatching), then layer diagonal bands of darker hatching on top at roughly 45 degrees to create the barred effect. Don't try to make it perfect — a slightly irregular pattern actually looks more like real feathers.
- Add the white rump: if the rump area has gotten too dark, use a kneaded eraser to lift the tone. Leave this area clearly lighter than the body above and the tail below.
- Refine the face details last: once the overall values are set, go back to the head and sharpen the cream cheek patch boundary against the black head, and add a small highlight to the eye if you haven't already.
- Check the overall value read from a distance: hold the drawing at arm's length. The head should be the darkest spot, the neck should read as distinctly pale, and the body should have a mid-tone texture. If any zone is blending into another incorrectly, adjust now with either added shading or careful erasing.
Common mistakes and how to fix them fast
| Mistake | Why it happens | Quick fix |
|---|---|---|
| Looks like a generic Canada Goose | Missing the pale streaked neck and barred body; only the black head was drawn | Check: did you add cream cheeks, pale neck streaks, and diagonal body barring? Add all three. |
| Body looks flat with no texture | Body was shaded as a single even tone with no barring | Add diagonal hatching bands at 45 degrees across the upperparts; vary pressure to create alternating light/dark rows |
| Head and neck blend together | Both drawn as the same tone; neck wasn't kept noticeably lighter | Erase or lighten the neck area; redraw it with lighter base tone and thin dark streak lines only |
| Proportions off — head too big or neck too long | Construction ovals weren't checked before adding detail | On your next attempt, set the head oval at one-quarter the body width and keep the neck length roughly equal to head width |
| Rump doesn't read as white | Shading carried across the whole rear of the body without leaving a lighter zone | Use a kneaded eraser to dab and lift the rump area above the tail; redraw the tail dark to create contrast |
| Legs look like sticks with no connection to the body | Leg placement wasn't established during construction | Re-anchor legs to the lower-center of the body oval; thicken them slightly at the top where they meet the body feathers |
Your next practice steps
Once your first side-profile drawing feels solid, push it further with these next moves. Try a three-quarter front-facing view: this angle is harder but it forces you to really nail the face patterning, the black face, cream cheeks, and pale streaked neck are all visible at once, and getting them right makes the drawing unmistakably a Nēnē. Then try a simplified head-only study: just the head, neck, and upper chest. This focused exercise is the fastest way to lock in the bird's signature look.
If you've been working in pencil, try the same sketch in ink (a fine-tip pen with cross-hatching for the barring) or go digital with separate layers for each value group. Digital tools make it easy to test different shading approaches without committing. For comparison, it's worth sketching another state bird with a similarly bold value contrast, like the Oklahoma state bird or the Illinois state bird, to see how different the construction approach is when you shift from a large goose to a songbird. If you want a different state-bird challenge, check out how to draw the Illinois state bird step by step as well. If you want a different look, try the Oklahoma state bird next and compare the proportions and pattern shapes to the Nēnē. The Nēnē's size and three distinct color zones make it one of the more forgiving state birds to draw as a beginner, as long as you treat the head, neck, and body as separate value groups from the start.
Keep a good reference image open every time you practice. The Nēnē's specific combination of cream cheeks, streaked pale neck, and diagonal body barring is distinctive enough that if your drawing looks right from a distance, you've nailed it. And if you want to go deeper on why Hawaii chose this particular bird as its state symbol, the Nēnē's conservation story is genuinely remarkable, the background on why the Nēnē is Hawaii's state bird adds a lot of meaning to the sketch you're making. To really nail the look, try sketching the official bird of Ohio by following its key shapes and color accents step by step Ohio state bird. If you are curious why this bird was chosen, the answer is tied to its role as Hawaii's state bird and its remarkable conservation story why the Nēnē is Hawaii's state bird.
FAQ
What if my drawing looks like a generic goose instead of a Nēnē?
Do a quick checklist against the three value groups, black head and bill, pale streaked neck, and diagonal barred body. If any one of these reads like “brown and gray all over,” your eye will interpret it as a common goose, so simplify the rendering until each zone is clearly distinct before adding more feather detail.
How do I draw the reduced webbed feet correctly when I cannot see them clearly in my reference?
Use a forked-foot shape and keep the legs fairly short and dark, then suggest the webbing with a single thin connecting line between toe bases. Prioritize the silhouette of the foot contacting the ground rather than tiny toe separations.
My neck streaks keep turning into thick bands. How can I keep them looking right?
Keep the streak lines narrow and parallel, place them lightly first, then darken only a few key lines for contrast. Also, limit the streak density so the neck still reads as a single pale “column” from a distance.
What is the fastest way to correct proportions if the head-to-body ratio feels off?
Start over using the “big shapes” approach, map an oval for the head, a longer oval for the body, then block in the neck as a pale connector with the correct length. Only after those masses feel right should you place the eye, cheek patch, and neck streaks.
How can I place the cream cheek patch without making it look like a random smudge?
Treat it like a small oval positioned near the lower side of where the ear would be, slightly below and behind the eye. Keep its value only slightly lighter than the head around it, then add the eye highlight so the cheek patch looks attached to the face structure.
Should I draw individual feathers or hatch in groups?
For beginners, hatch in groups for the barred body, using diagonal bands with deliberate gaps for the lighter feather rows. Individual feathers can be added only on a few wing-edge shapes, otherwise you will lose the overall diagonal pattern that identifies the Nēnē.
How do I choose between a side-profile and a three-quarter view?
If your goal is correct proportions and body pattern layout, begin with the side profile. Choose three-quarter when you already have the head, cheek patch, and neck streak placement working, because that angle exposes face pattern errors immediately.
What should I do if the rump area in my drawing is not standing out enough?
Make the rump a clearly lighter patch, almost white, even if you keep surrounding tones textured. A common mistake is treating it as a highlight, instead of a distinct value region, which makes the bird look flat.
How do I avoid over-darkening the head and losing the contrast structure?
Darken the head oval and bill to a solid deep black, but keep transitions controlled by leaving the cheek patch and the eye area separated. If everything around the face becomes the same darkness, the pale neck column and cheek shapes will not “pop.”
Can I use digital layers or pen safely without wrecking the pattern?
Yes, separate layers by value group, very dark, mid-dark bars, and light areas like neck and rump. Use cross-hatching only on the body layer first, check readability at small size, then add the eye highlight last so it remains crisp.
Next Article
How to Draw Illinois State Bird Northern Cardinal Step by Step
Step-by-step guide to drawing the Illinois state bird, the Northern Cardinal, with accurate beak, crest, wings, and shad