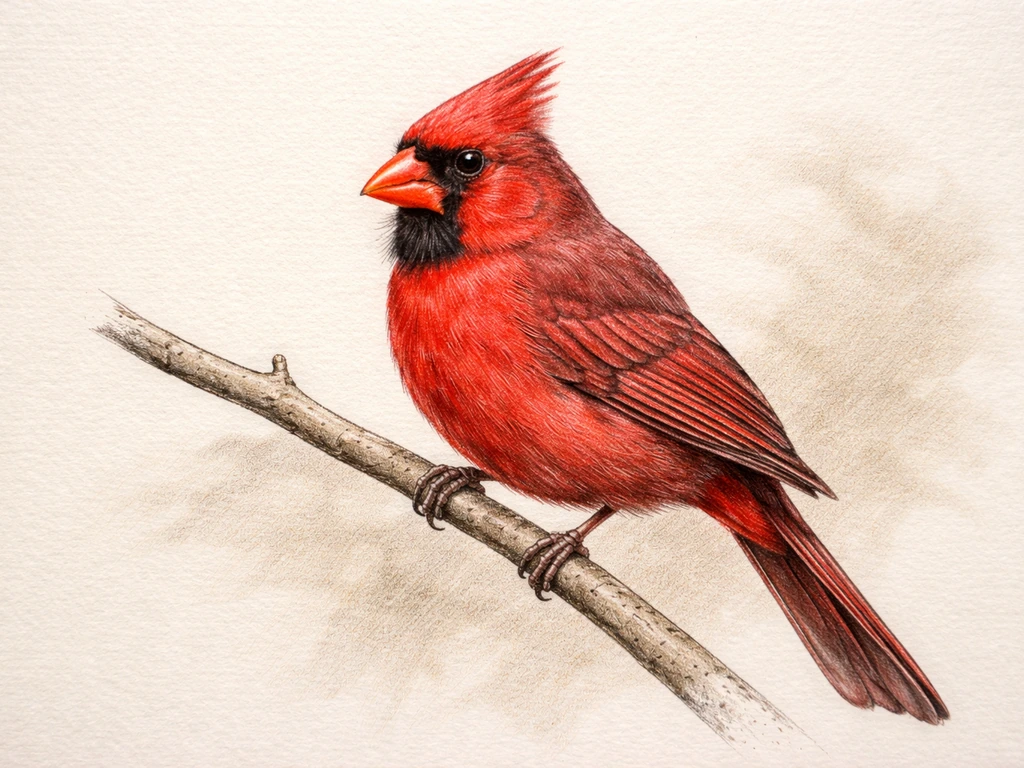
Illinois' state bird is the Northern Cardinal (Cardinalis cardinalis), and drawing it well comes down to nailing three things: the upright, hunch-shouldered posture, the dramatic crest-and-mask combo on the head, and the deep red plumage layered correctly so it doesn't look flat. To learn how to draw the Oklahoma state bird, use the same approach: study the key field marks first, then build the body with simple shapes before adding details. Once you know what to look for and how to build the shapes from scratch, even beginners can produce a recognizable cardinal in a single sitting.
How to Draw Illinois State Bird Northern Cardinal Step by Step

Marcus Webb
12 Jun 2026
What the Illinois state bird actually looks like
The Northern Cardinal is a medium-sized songbird, and the male is one of the most visually striking birds in North America. He is mostly brilliant red from crest to tail, with a bold black mask that covers the face, throat, and the area around the base of his short, thick orange-red bill. The crest is prominent and pointed, sitting high on the skull. His tail is relatively long compared to his compact body, and he tends to perch upright with the tail angled downward, giving him a slightly hunchbacked silhouette.
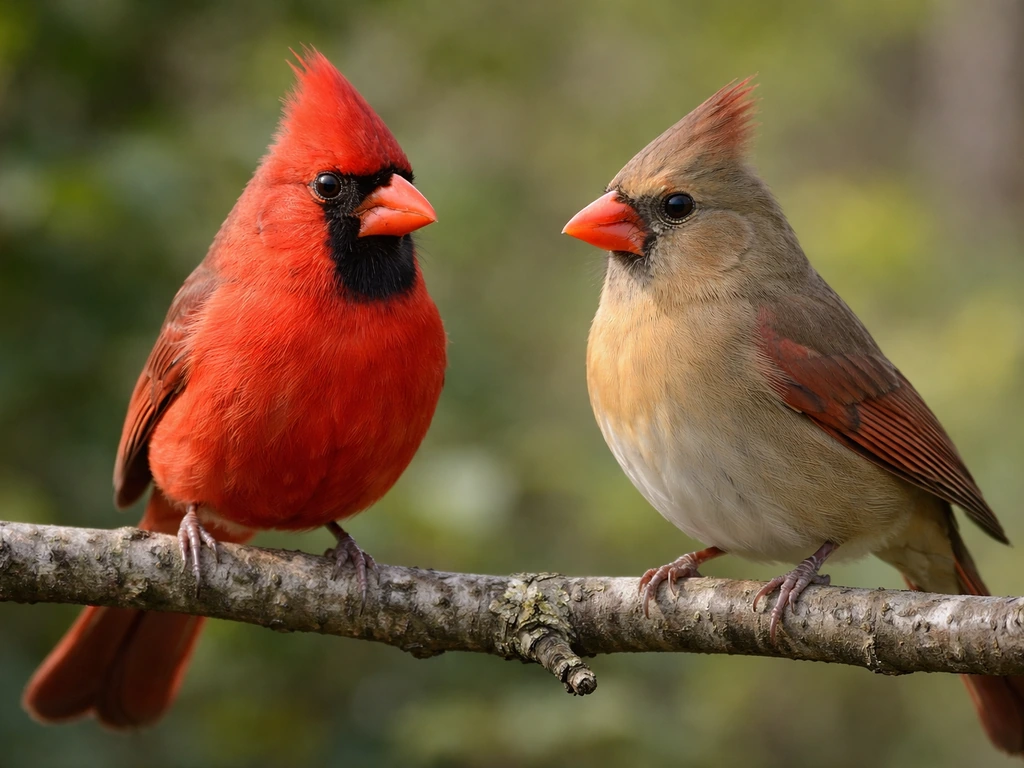
The female is an equally useful drawing subject. She's pale brown overall with warm reddish tinges in the wings, tail, and crest, and she shares the same crest shape, body proportions, and orange-red bill. The Minnesota DNR notes that the Northern Cardinal female is gray-brown on the back and light tan on the breast, with bright pink highlights on the wings, tail, and crest the female is gray-brown on the back and light tan on the breast. If you're drawing for accuracy, the female is actually a good way to practice shape and proportion before committing to the male's vivid red palette.
| Feature | Male | Female |
|---|---|---|
| Body color | Brilliant red overall | Pale brown / buff |
| Crest | Red, prominent, pointed | Reddish-brown, prominent, pointed |
| Mask | Black around face and throat | Minimal or absent |
| Bill | Short, thick, orange-red | Short, thick, reddish-orange |
| Wing/tail tones | Solid red | Reddish tinges on wings, tail |
| Tail length | Relatively long | Relatively long |
Get your references and materials together first
Before you draw a single line, pull up two or three reference photos of a Northern Cardinal perched on a branch or feeder. The Cornell Lab's All About Birds site has an excellent photo gallery for both sexes, and the American Bird Conservancy has clean illustration references. What you're looking for specifically: the angle of the crest, the way the black mask meets the bill, and the overall body silhouette from the side. A perched side-view profile is the easiest starting pose.
For materials, you don't need anything fancy to start. A basic pencil setup works fine for the line drawing stage.
- Pencils: HB for initial shapes, 2B or 4B for darker lines and shadow
- Eraser: a kneaded eraser is gentler on paper and lifts graphite without tearing
- Colored pencils or watercolor for the final coloring stage (Prismacolor or similar wax-based pencils give the richest red saturation)
- White or light cream drawing paper, at least 90gsm so it handles layering without warping
- A printed or on-screen reference photo at a fixed size so you're not constantly scaling in your head
Block in the shapes: proportions for the cardinal body
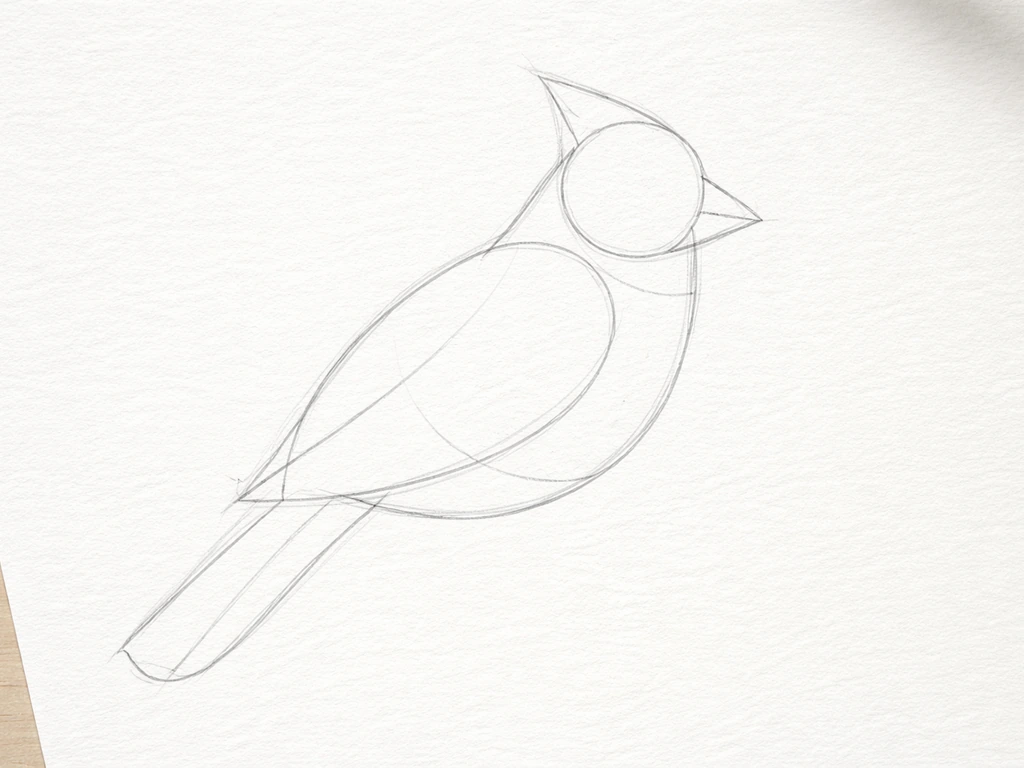
The most reliable way to avoid proportion problems is to build the bird from geometric shapes before drawing any detail. Think of it as scaffolding you'll erase later.
- Draw an oval for the body, roughly egg-shaped with the wider end toward the chest and a slight taper toward the tail. This is your largest shape and should take up about half the total height of your final drawing.
- Add a smaller circle for the head, positioned at the upper-front of the body oval, slightly overlapping. The head circle should be about half the width of the body oval.
- Draw a light axis line from the tip of the bill through the center of the head and down through the body. This spine line controls the bird's angle and tilt.
- Sketch a long, narrow triangle extending from the back of the body oval for the tail. The cardinal's tail is notably long relative to the body, so don't cut it short.
- Lightly block in the wing as a flat shape overlapping the back half of the body oval. At rest, the wing folds against the body and does not extend past the tail.
- Add a small upward-pointing spike on top of the head circle for the crest. This is a key identifying shape. The crest is not a gentle curve; it rises to a distinct point.
At this stage your drawing should look like simple, connected shapes with no detail. That's exactly right. Use the head circle as your proportional ruler: the body oval should be roughly twice the diameter of the head, and the tail should extend about one head-length beyond the body.
Step-by-step line drawing: beak, crest, eye, and feather layout
Once your basic shapes feel right, refine them one feature at a time. Work from the head down, and resist the urge to jump to feather detail until the structural lines are solid.
- Refine the bill: The cardinal's bill is short and very thick, almost conical, with a strong downward curve on the upper mandible. Draw it meeting the head at roughly the mid-point between the top and bottom of the head circle. It should look powerful, not delicate.
- Define the crest: Extend the crest spike you sketched earlier into a slightly curved, pointed shape. The crest feathers flow upward and slightly backward, not straight up like a spike. Add a light curve from the base of the crest down to the back of the neck.
- Place the eye: The eye sits slightly toward the front of the head, roughly one-third of the way down from the crown. Draw it as a small filled circle. Add a tiny highlight dot if you want life in the eye. The black mask begins here and sweeps down around the bill and throat.
- Draw the mask: Using the eye as your anchor, sketch the black mask as a roughly teardrop or shield shape around the eye and bill, extending down to the throat. The edge of the mask where it meets the red plumage is a hard, defined border, not a soft blend.
- Refine the body outline: Smooth the connection between the head and body, adding a slight chest puff at the front. The back has a gentle slope. The belly has a soft, rounded contour.
- Block feather groups: Rather than drawing individual feathers, sketch the major feather zones with light directional lines. Primary flight feathers angle backward and downward along the trailing edge of the wing. The back feathers flow toward the tail. Breast feathers radiate downward from the chest.
- Add the feet and perch: Two simple curved lines for the legs, ending in three forward-facing toes and one back-facing toe gripping the perch. Keeping the perch simple (a single horizontal branch) focuses attention on the bird.
Color and shading to capture cardinal markings
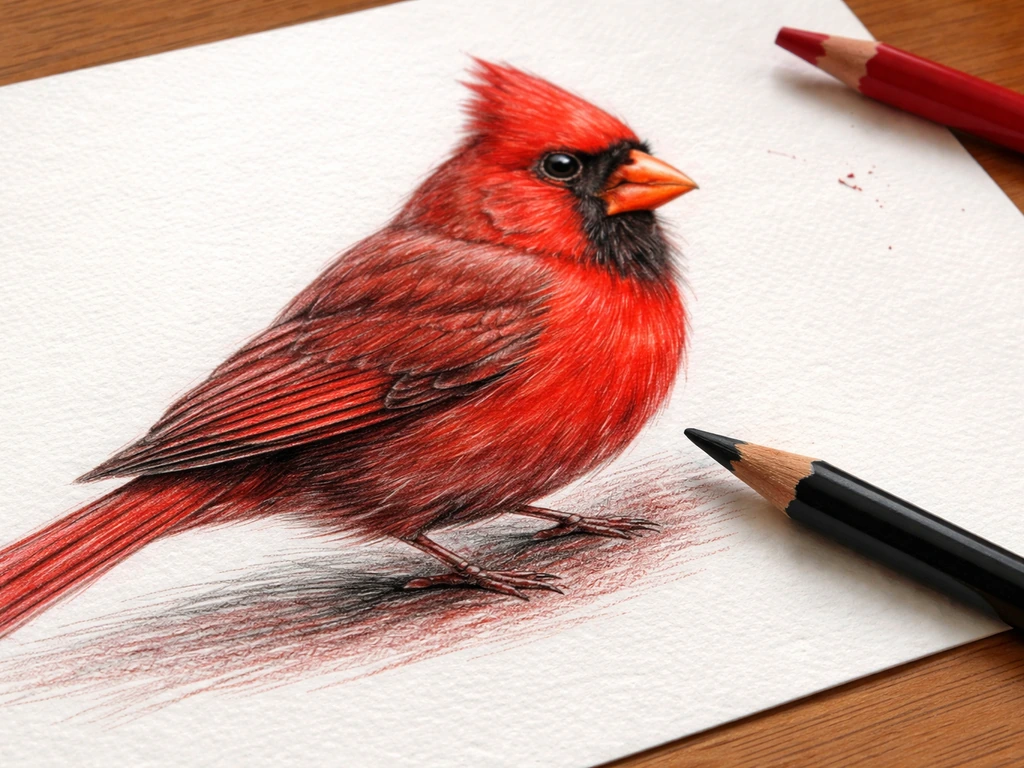
Flat red is the single biggest mistake people make when coloring a male cardinal. Real cardinal red has depth: darker in the shadows under the wings and belly, brighter and almost orange-red on the crest and upper back in direct light. The bill is distinctly orange-red rather than pure red, and the mask is pure matte black.
Start with your darkest values first. Use a black colored pencil to lay in the mask and the deep shadow areas under the wing and where the wing meets the body. Don't skip this step. Building dark anchors first gives you a reference point so the red doesn't look washed out.
- Shadow layer: Apply a dark red or crimson pencil in long, feather-direction strokes over the shadow areas (under wing, belly, behind the crest). Keep strokes following the direction feathers grow.
- Mid-tone layer: Add a true red over most of the body, blending into the shadow layer at the edges. Use medium pressure.
- Highlight layer: Apply a brighter red or red-orange on the crest, upper back, and any area catching direct light. Light pressure, feather-direction strokes.
- Bill color: Use an orange-red or warm orange pencil. The bill is lighter and more orange than the body. Add a very light highlight near the top of the upper mandible.
- Black mask: Fill the mask area solidly with black, keeping a clean, hard edge where it meets the red. Burnish it slightly for a matte look.
- Wing feather detail: The primary flight feathers at the wing edge are slightly darker red or even a deep burgundy. A subtle warm-gray shadow under the folded wing edge adds realism.
- Eye: Fill the eye black, leaving the tiny highlight dot white or applying a small white pencil dot on top.
For the female, swap the reds for warm browns and tans, and use a softer reddish-orange on the crest, wings, and tail. Her bill is the same orange-red as the male's, which is one of the best field marks to get right in any drawing.
Common drawing mistakes and how to fix them fast
Most beginner cardinal drawings go wrong in the same few places. Here's what to watch for and how to course-correct without starting over.
| Mistake | Why it happens | Quick fix |
|---|---|---|
| Crest looks like a bump, not a point | Drawn as a smooth curve rather than a spike | Sharpen the tip of the crest; add a clear angle break between the slope up and the slope back down |
| Bill looks too narrow or too long | Using songbird 'default' bill shape instead of the thick cardinal bill | Redraw the bill wider at the base; the upper and lower mandibles should look nearly triangular |
| Body too round and pigeon-like | Body oval drawn as a perfect circle rather than an egg | Elongate the back of the oval; the tail end should taper slightly |
| Red looks flat and plastic | Single layer of one red applied evenly | Add shadow red first, then mid-tone, then highlight using feather-direction strokes |
| Mask has soft, fuzzy edges | Blended too gently into the red plumage | Use a sharp pencil edge along the mask border; the transition is abrupt, not gradual |
| Eye placed too far back on head | Placing eye at center of head circle instead of toward the front | Move the eye so it sits in the forward third of the head |
| Tail too short | Tail treated as an afterthought | Extend the tail triangle; it should be roughly as long as the body from chest to back |
Why Illinois chose the cardinal, and what to draw next
Illinois adopted the Northern Cardinal as its official state bird through a schoolchildren's vote, and the designation was made official on June 4 (recorded in the Illinois Secretary of State's chronology of state history). What makes the choice historically notable is that Illinois was the first of seven states to select the Northern Cardinal as its state bird. Indiana, Ohio, Kentucky, Virginia, West Virginia, and North Carolina eventually followed, making the cardinal the most shared state bird in the U.S. That's a detail worth knowing while you draw: you're sketching a bird that seven states collectively decided best represents them.
The species name, Cardinalis cardinalis, reflects how defining the bird's red coloration was considered. The common name comes from the red vestments of Catholic cardinals, which gives you a sense of how striking the male plumage was to early European settlers in North America.
Where to take your practice next
- Try drawing the female cardinal using the same shape framework. It forces you to focus on structure rather than color, which sharpens your proportion skills.
- Practice the cardinal in a different pose: facing three-quarters toward the viewer, or mid-turn. The crest angle and bill placement look different from every angle, which builds real species recognition.
- Sketch from a live feeder if cardinals visit your area. Quick 30-second gesture sketches, repeated many times, will improve your feel for the bird's natural posture far faster than any single careful drawing.
- Compare your cardinal drawing against the state bird drawings for other states that share this bird, such as Ohio or Oklahoma, to see how the same species is interpreted differently by different artists.
- If you want to explore how drawing challenges vary by species, the approaches used for the Hawaii state bird (the Nene goose) or the Arizona state bird (the Cactus Wren) make interesting contrasts because their body shapes and field marks are completely different from the cardinal's.
The cardinal is a rewarding subject precisely because its field marks are so bold. The crest, mask, and bill are not subtle details you have to hunt for: they define the silhouette. Get those three elements right in your line drawing, layer your reds from dark to light following feather direction, and you'll have a drawing that's immediately recognizable as Illinois' state bird. BirdDetails similarly recommends using a warm-gray base coverage and then building the wings and tail with careful layering and smooth transitions from shadow to highlight blank" rel="noopener noreferrer">layer your reds from dark to light following feather direction. If you want another state-bird challenge right after this, use the same approach for how to draw arizona state bird. If you want a challenge after this, the steps for how to draw Ohio's state bird will help you practice similar shape and feather layout skills with a different species how to draw ohio state bird. If you want a Hawaii-specific project instead, look up the hawaiian name and proportions of the state bird so you can adapt the same drawing workflow immediately recognizable as Illinois' state bird. For a Nevada bird, you can use the same step-by-step approach, then adapt your shapes and colors to match Nevada's state bird. You might also be wondering why another bird, like Hawaii's state bird, was chosen and what makes it distinctive. Hawaii's state bird is the Nene, also known as the Hawaiian goose.
FAQ
What pose should I draw if I want the easiest Illinois cardinal (side view vs front view)?
Start with a perched side profile. It lets you place the crest angle, the black mask to bill line, and the upright, hunch-shouldered body silhouette without foreshortening. Front views are harder because the mask can look misaligned around the beak, even if the colors are correct.
How do I prevent the black face mask from looking like it was “stickered on”?
Outline the mask edges first using light construction lines, then fill in with matte black only where shadows naturally fall (around the bill base and under the crest). Keep a tiny transition area at the top of the mask so it visually meets the red feathers instead of sitting as a flat shape.
My cardinal looks too red and flat after coloring, what should I change first?
Fix the darkest anchors before you add bright red. Put down the deepest values under the wing and along the belly shadows first, then glaze lighter reds over top. Also mix in warmer, almost orange-red on the crest and upper back, and reserve the most saturated red for the brightest lit planes.
What’s the best way to get the bill color accurate, especially compared to the plumage?
Use a distinct orange-red for the bill, don’t color it the same red as the body. Shade darker toward the lower bill and add a lighter highlight along the top edge, this contrast is what makes the head read as “cardinal” instantly.
How can I draw the female cardinal without losing the recognizable shape?
Keep the same structure as the male (crest shape, upright posture, body oval twice the head size). Then switch the palette, warm browns and tans in the body, and a softer reddish-orange only on the crest, wings, and tail. If you change the structure, the bird may stop looking like a cardinal.
Where exactly should I place the crest so it doesn’t end up crooked or too large?
Treat the crest as a pointed fan sitting high on the skull, align it with the head’s centerline. If your crest looks tilted, check the head circle first, then redraw a few guide lines for the skull angle before adding any feather strokes.
What common proportion mistake ruins cardinal drawings, and how do I correct it fast?
The body often ends up too big or the tail too short. Use the head diameter as your ruler, aim for a body oval around twice the head size, and let the tail extend about one head-length beyond the body. If you catch it early, fix it during the shapes stage before detailing.
Should I draw feathers one-by-one or use a simpler approach?
For beginners, avoid drawing individual feather lines all over. Use directional feather “groups” that follow the bird’s body curves, then deepen values in the shadowed areas. Once the volume reads correctly, add only selective feather edges near the crest, wing, and tail for clarity.
How do I shade the wings so the red doesn’t blend into a single color blob?
Separate the wing into shadow and light zones first. Place dark values where the wing meets the body and under the wing fold, then build midtones across the outward planes. This keeps the red layered and makes the wing fold visible even without tiny feather detail.
Do I need to use a dark pencil, or can I use a light-only coloring method?
A light-only method is harder for cardinals. Dark anchors (mask, wing shadows, and belly under-shadows) give you a value map so the subsequent reds look dimensional instead of washed out.
How can I check my drawing for “cardinal-ness” before finishing details?
Do a quick silhouette check. Squint at your sketch or view it in a small thumbnail. The drawing should still read as an upright, compact bird with a prominent crest and a clear black mask-and-bill combo. If those elements are fuzzy in silhouette, fix them before moving to fine feather work.
Next Articles
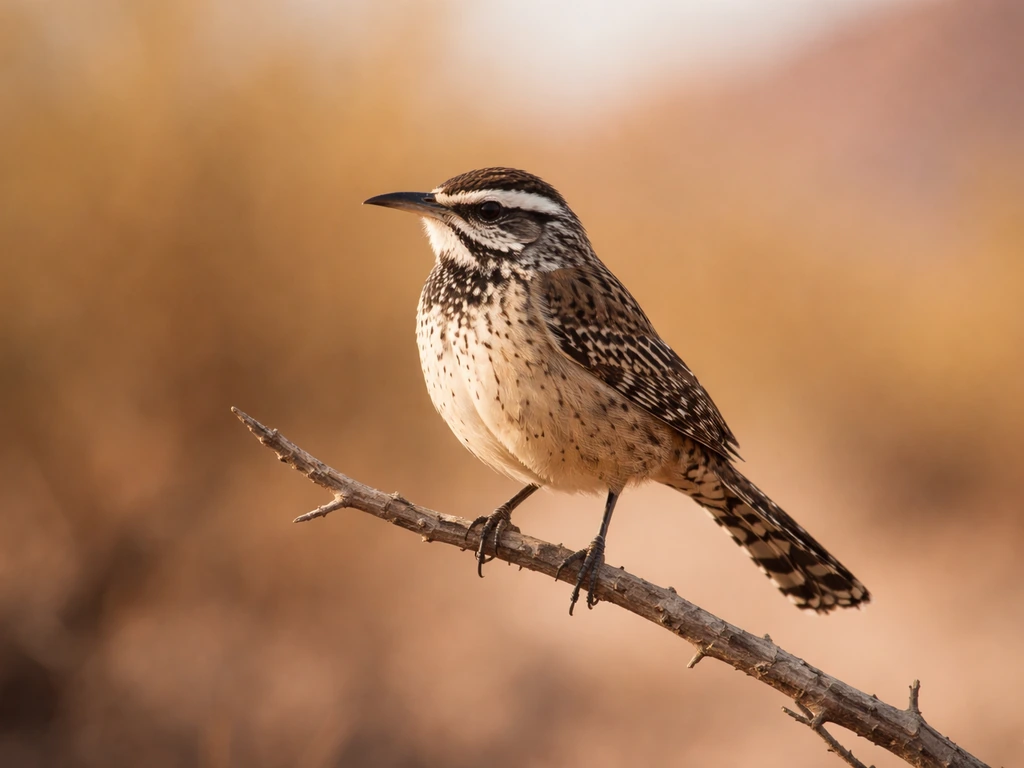
How to Draw Arizona State Bird Cactus Wren Step by Step
Step-by-step guide to draw the Arizona cactus wren, with proportions, silhouette, key markings, and easy shading tips.
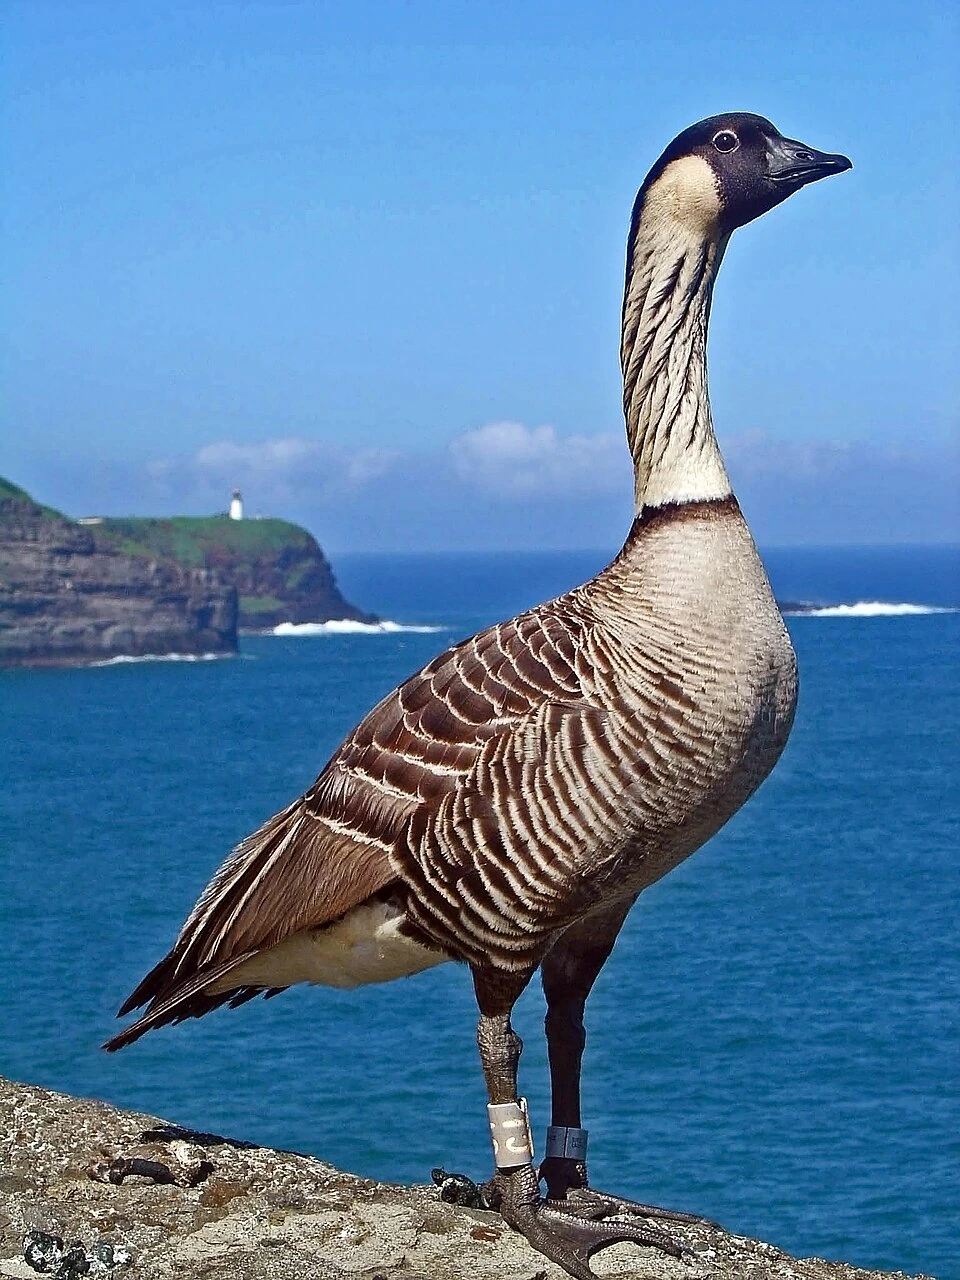
Why Is the Nēnē Hawaiʻi’s State Bird? Reasons and ID Tips
Learn why nēnē is Hawaiʻi’s state bird and how to identify it, plus its conservation status and unique significance

What Is Hawaii’s State Bird? The Nēnē (Hawaiian Goose)
Hawaii’s state bird is the nēnē, the Hawaiian goose, native and endangered on the islands with ongoing recovery.